Step Wizard Form
Step Wizard Form
Introduction
- Item Name : Step Wizard Form
- Item Version : v 1.0
First of all, Thank you so much for purchasing this template and for being my loyal customer.
You are awesome!
You will get the support in time. You will be happy to hear that It may take no longer than one day. We always try to support you as fast as we can. Our cutomers are our main priority.
This documentation is to help you regarding each step of customization. Please go through the documentation carefully to understand how this template is made and how to edit this properly. Basic HTML and CSS knowledge is required to customize this template. You may learn basics here and here.
Requirements
You will need the following sofwares to customize this template.
- Code Editing Software (eg: Brackets, Sublime Text or Notepad)
- Web Browser for testing (eg: Google Chrome or Mozilla Firefox)
- FTP Tool to upload files to Server (eg: FileZilla)
Be careful while editing the template. If not edited properly, the design layout may break completely.
No support is provided for faulty customization.
Getting Started #back to top
Wizard Step Layout - #back to top
Wizard Step. Open project path with your comamnd line, and run 'npm start'
~/code/neon-react ᐅ npm start
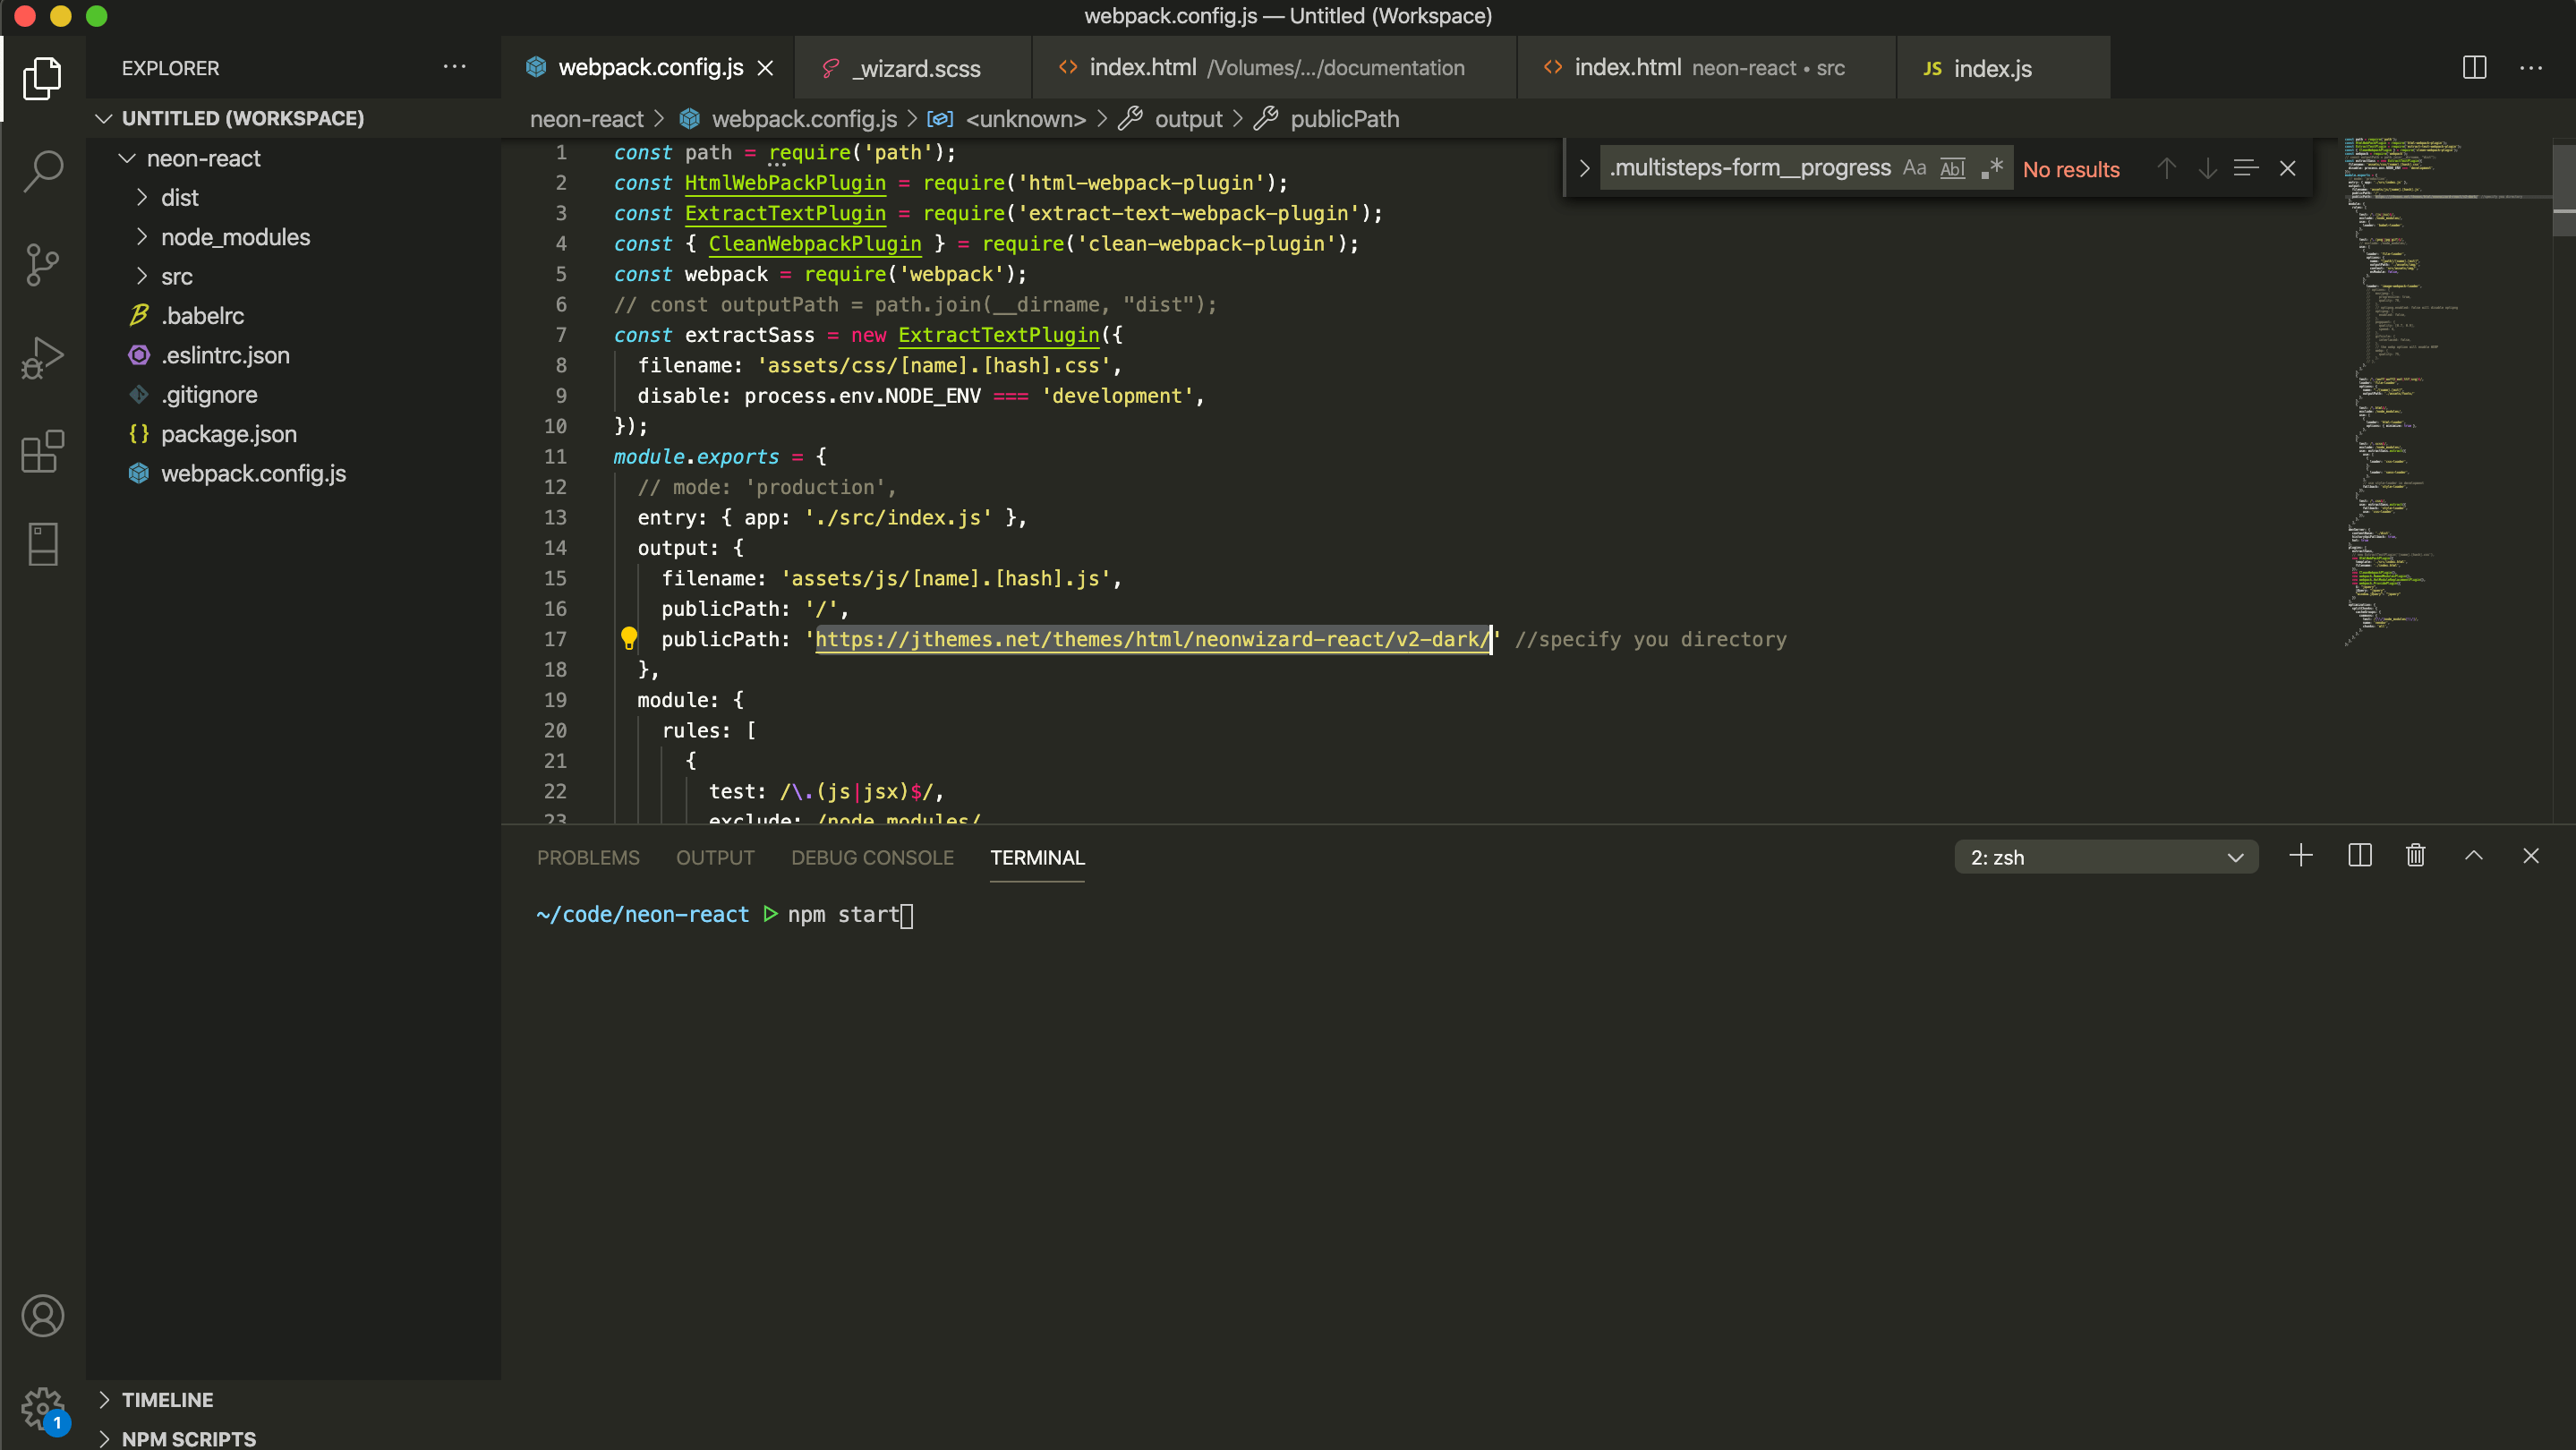
~/code/neon-react ᐅ npm run build
How to run development mode?
~/code/neon-react ᐅ npm run dev
Overview
According to version 2
index.js
                                    import './App';
                                    import 'bootstrap/dist/css/bootstrap.min.css';
                                    import './assets/css/bootstrap-datepicker.css';
                                    import './assets/css/fontawesome-all.css';
                                    import './assets/css/animate.min.css';

                                    //main css
                                    import './assets/scss/style.scss';

                                    import 'bootstrap';

                                    import './assets/js/bootstrap-datepicker.min.js';
                                    import './assets/js/jquery.validate.min.js';
                                    import './assets/js/main.js';
                                    module.hot.accept();
app.js
import React from 'react';
import ReactDOM from 'react-dom';
import {
BrowserRouter as Router,
Switch,
Route
} from "react-router-dom";
import VersionTwo from './components/version-two';
const getBasename = path => path.substr(0, path.lastIndexOf('/'));
const App = () => {
return (
);
};
export default App;
ReactDOM.render(
import React from 'react';
import Step1 from './step/step-1';
import Step2 from './step/step-2';
import Step3 from './step/step-3';
import Step4 from './step/step-4';
import Step5 from './step/step-5';
class VersionTwo extends React.Component {
render() {
return (
Upgrade your Account
)
}
};
Step Add/Remove #back to top
Step Add / Remove - #back to top
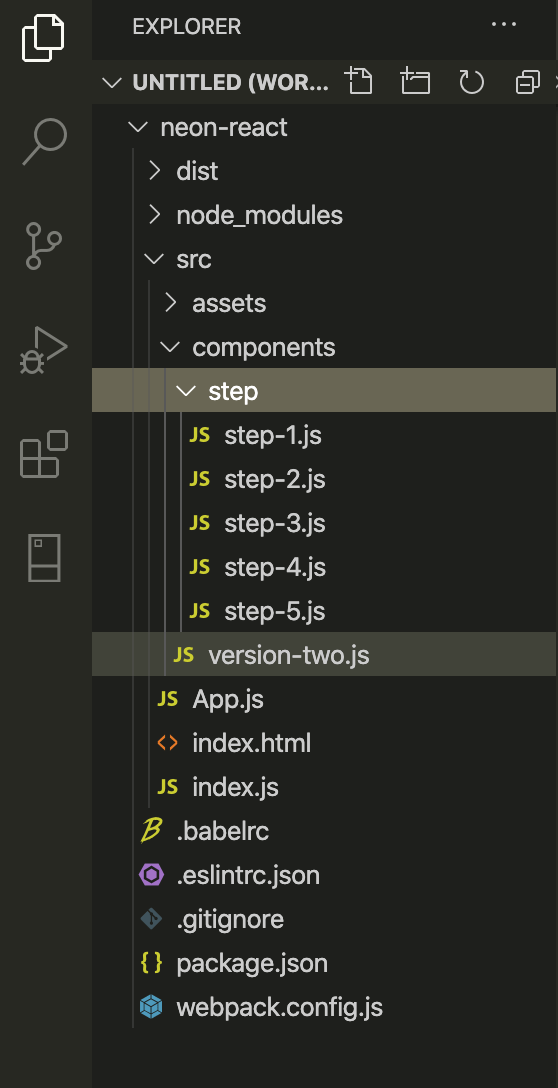
If you Want Add or Remove step just clone step. You will find step in src/components/step.
                                   import React from "react";

                                   class StepOne extends React.Component {
                                   render() {
                                   return (

                                       ...

                                   );
                                   }
                                   }

                                   export default StepOne;
Animation Changes Option - #back to top
If you Want change animation - Follow this.
Just change here
data-animation="slideHorz"
By default you can use - scaleOut, slideHorz, slideVert, fadeIn, scaleIn
data-animation="scaleOut"
data-animation="fadeIn"
You can use animate css effect as well, visit https://animate.style/
To use animate css follow this --
data-animation="animate__bounce"
data-animation="animate__bounceInLeft"
data-animation="animate__swing"
Color Changes Option - #back to top
If you Want Color change- Follow this.
Open Color folder from css folder then change your color code and paste there. After that import this css in your index.jsimport './assets/css/color/your-color.css';
Here is your color css
                                .wizard-part-title h3,
                                .wizard-title h3,
                                .wizard-title p,
                                .steps li.current:before,
                                .steps li.checked:before,
                                .multisteps-form__progress-btn.js-active,
                                .wizard-content-item h2,
                                .wizard-content-item p,
                                .badge-selection span,
                                .badge-selection h3,
                                .wizard-form-input input::-webkit-input-placeholder,
                                .wizard-option-list li .option-item-list select,
                                .wizard-option-list .upload-araa .upload-text span,
                                .wizard-option-list .upload-araa .upload-option label,
                                .wizard-option-list .texable-option,
                                .wizard-identity .upload-option label,
                                .identity-option li,
                                .wizard>.steps li.checked a:after,
                                .wizard>.steps li.current a:after,
                                .n-summary span,
                                .n-checked span,
                                .n-select-option select,
                                .wizard-option-list li:before,
                                .wizard-option-list .taxable-area .checkbo-box-border:before,
                                .multisteps-form__progress-btn.js-active:before,
                                .plan-icon-text .plan-icon i,
                                .plan-icon-text:before,
                                .n-activity .n-title,
                                .block-option .checkbox-tick:before
                                {
                                    color: #ffa700 !important; // change here
                                }


                                .actions li span,
                                .actions li button,
                                .wizard-progress .progress .progress-bar,
                                .has-float-label i,
                                .service-check-option span:after,
                                .identity-option li label input[type="checkbox"]:checked+.checkmark,
                                .steps-area .steps li.js-active span,
                                .steps-area .steps li span:after,
                                .budget-area .opti-list li.active:after,
                                .duration-option .checkbox-circle-tick:after,
                                .wizard-document-upload label.custom-file-label:after,
                                .w-service-box:before,
                                .slick-dots li.slick-active,
                                .w-service-box .option-seclect,
                                .steps li.current:after,
                                .steps li.checked:after
                                {
                                    background-color: #ffa700 !important; // change here
                                }


                                .wizard>.steps li.checked a,
                                .wizard>.steps li.current a,
                                .steps-area .steps li.js-active:before,
                                .multisteps-form__progress-btn.js-active:before,
                                .form-inner-area input:focus,
                                .budget-area .opti-list li.active,
                                .services-select-option li.active:after,
                                .services-select-option li.active,
                                .budget-area .opti-list li.active:after,
                                .duration-option .d-checkbox:checked ~ .duration-box,
                                .service-checkbox:checked ~ .w-service-box,
                                .block-option .checked-checkbox:checked ~ .checkbox-tick:after
                                {
                                    border-color: #ffa700 !important; // change here
                                }
Form Validation #back to top
To validate form use "required" attribute or use .required class. You can visit for more about validation - https://github.com/jquery-validation/jquery-validation or https://jqueryvalidation.org/
Mail #back to top
Open mail.php file or create a mail.php file and paste following code on it.
$service = $_POST['services'];
$full_name = $_POST['full_name'];
$email = $_POST['email'];
$number= $_POST['number'];
$gender= $_POST['gender'];
$code_opti1= $_POST['code_opti1'];
$code_opti2= $_POST['code_opti2'];
$code_opti3= $_POST['code_opti3'];
// etc
$to = 'dexayo5005@lexu4g.com'; // change here
$subject = 'Your Service Details'; // change here
$from = 'test@email.com'; // change here
// To send HTML mail, the Content-type header must be set
$headers = 'MIME-Version: 1.0' . "\r\n";
$headers .= 'Content-type: text/html; charset=iso-8859-1' . "\r\n";
// Create email headers
$headers .= 'From: '.$from."\r\n".
'Reply-To: '.$from."\r\n" .
'X-Mailer: PHP/' . phpversion();
// Compose a simple HTML email message
$message = '';
$message .= 'Hi '.$full_name.'!
';
$message .= 'You are register for '.$service.'
';
$message .= 'Here is your details
';
$message .= 'Email: '.$email.'
';
$message .= 'Phone: '.$number.'
';
$message .= 'Gender: '.$gender.'
';
$message .= 'Optimization and Accessibility: '.$code_opti1 . $code_opti2 . $code_opti3.'
';
$message .= '';
// Sending email
if (mail($to, $subject, $message, $headers)) {
echo 'Your mail has been sent successfully.';
} else {
echo 'Unable to send email. Please try again.';
}
How to store data in google drive with spreadsheet #back to top
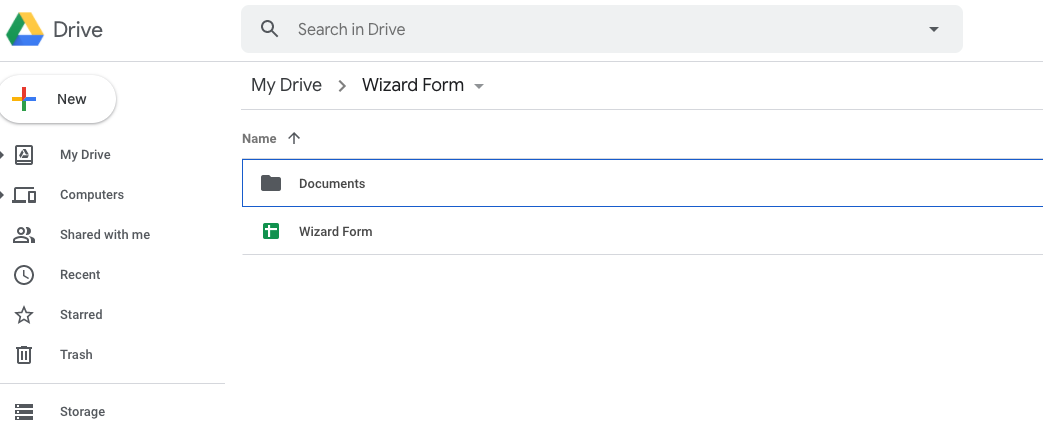
Create a folder in google drive. Open that folder and make another folder into it.
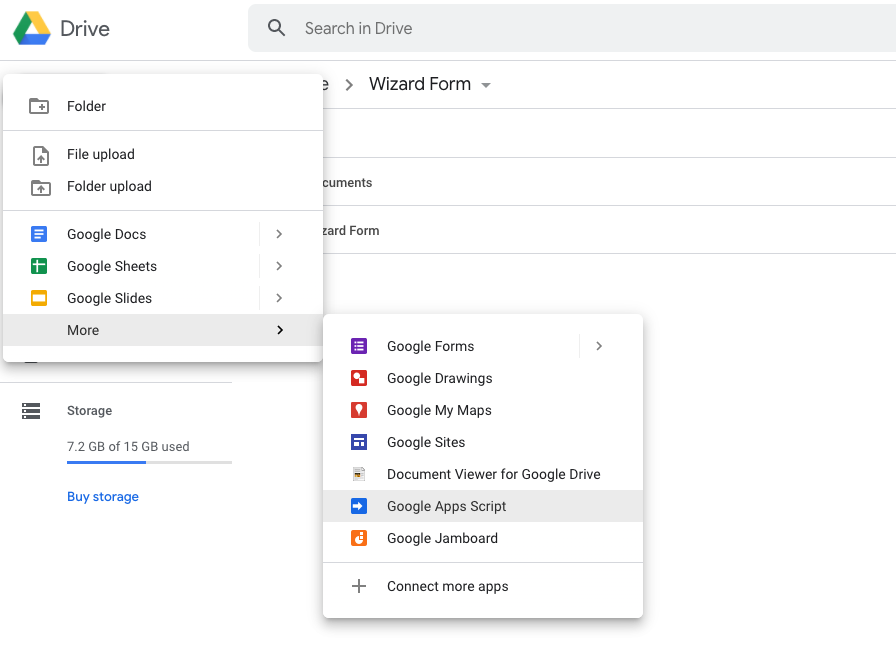
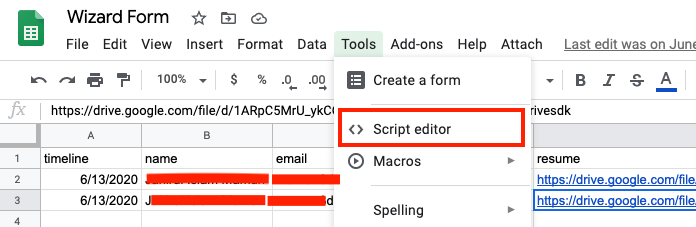
Create Spread sheet > Click New >> More >> Google Apps Script
Make fields - Spreadsheed overview
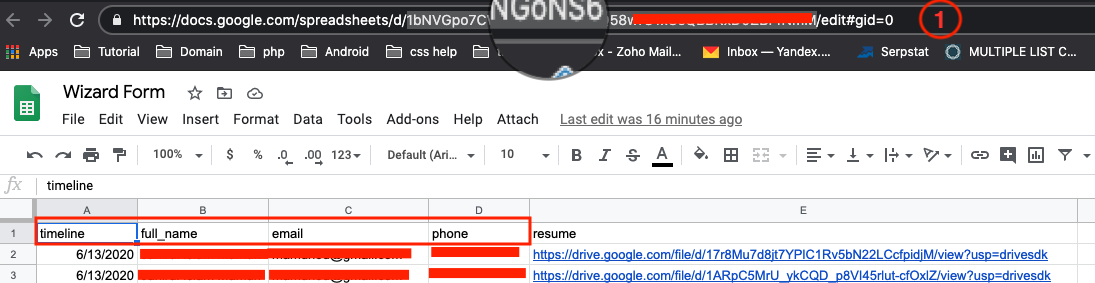 You have to follow your html's name field. It must same name. For example- Here namefield
 full_name then spreadsheet field must be full_name
Write code - Go Tools >> script editor
In download package your will get code.gs. just copy and paste it here. Now you have to change littlebit.
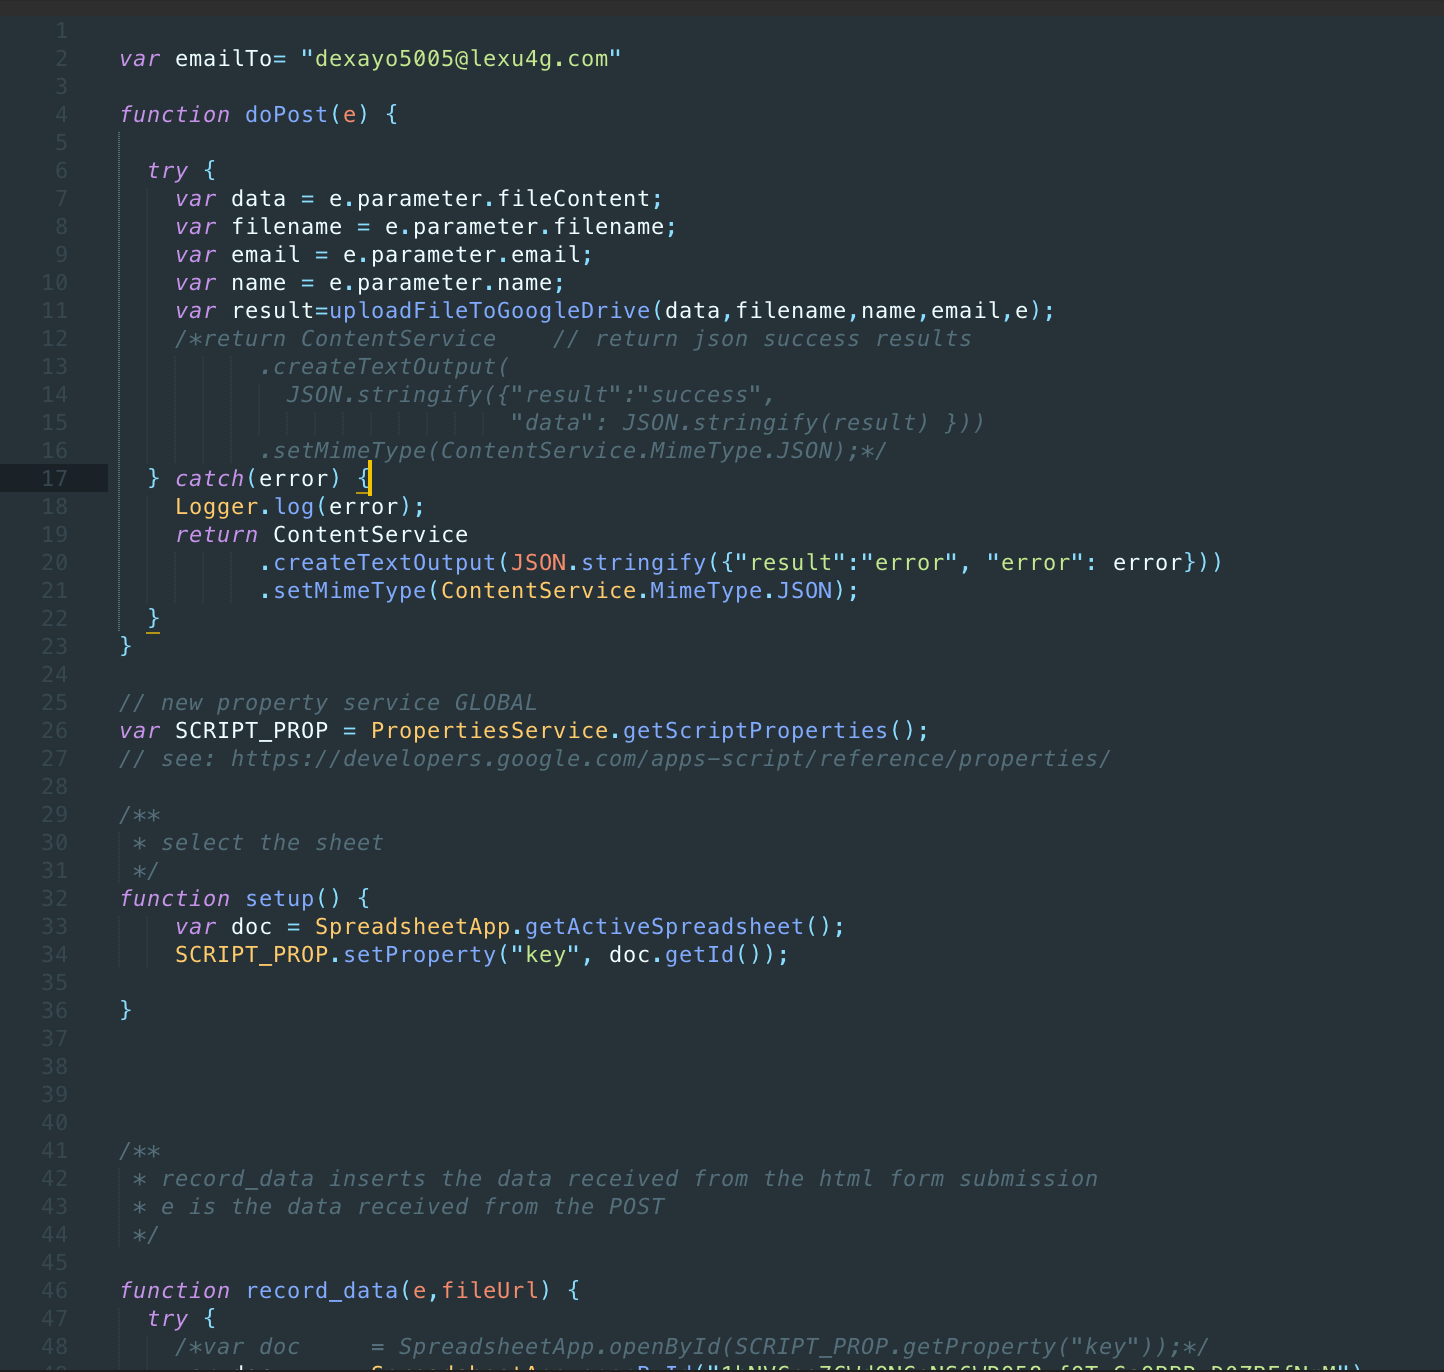
- Line 2 : Email address change
- Line 49 : Spreadsheed Id (see Spreadsheed overview
red mark 1) like - 1bNVGpo..RQ58wfOTxGsQBBR...
                    function record_data(e,fileUrl) {
                    try {
                    /*var doc     = SpreadsheetApp.openById(SCRIPT_PROP.getProperty("key"));*/
                    var doc     = SpreadsheetApp.openById("your spreadsheet id"); // change here
                    var sheet = doc.getSheets()[0];
Line 84 , Documents you have to change with your folder name.
                    function uploadFileToGoogleDrive(data, file, name, email,e) {
                    try {
                    var dropbox = "Documents"; //your dropbox folder where pdf, jpg will store
                    var folder, folders = DriveApp.getFoldersByName(dropbox);

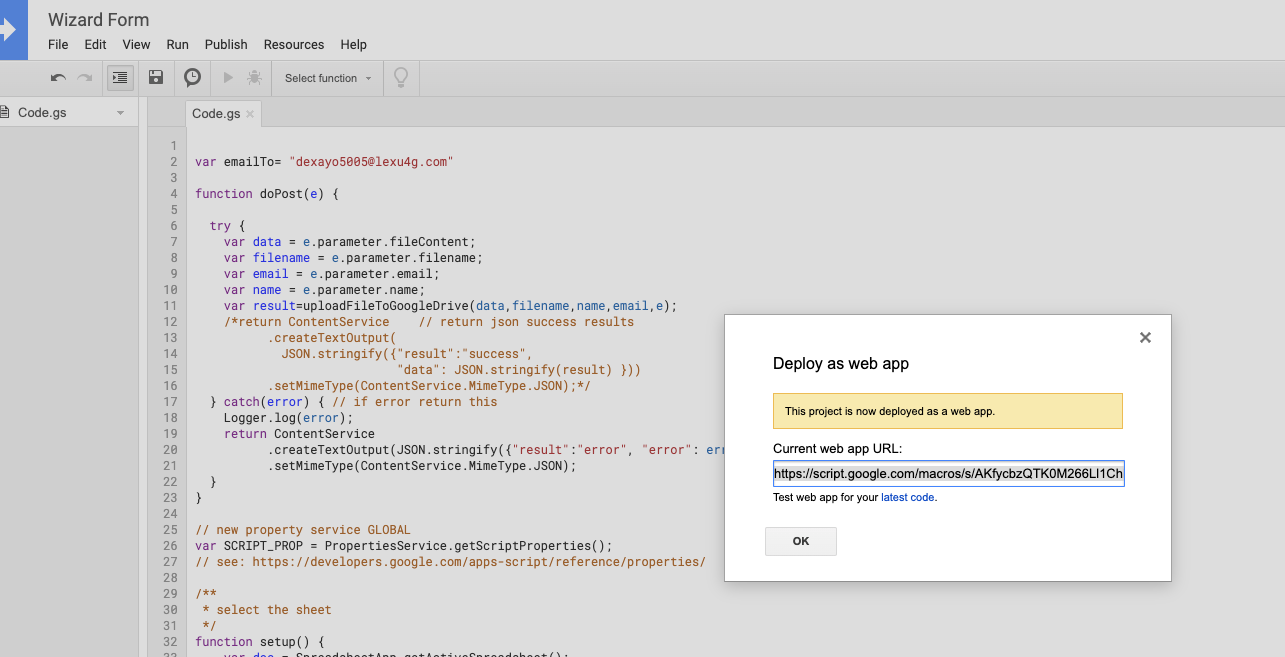
Now Use this link in the form action and make method POST
 And In submit button use -- onclick="UploadFile();" or you can modify the js code.