1.Download Package from ThemeForest.
After purchasing our theme, you need to go your download area, click on button Download and select download All files & documentation.
2.Extract Package
After download completed, you need to unzip the package and select the way you want to install the theme.
Once the download is complete, unzip the file and you would see the following packages:
- Documentation – our detail documentation for the theme
- Licensing – the theme license
- Theme – for manual installation
3.1. Installation Theme:
Theme Installation via WordPress
Please, follow the steps below to install Neuron Theme (Make sure you had extract files).
- Step 1 – Login to your WordPress Dasrdoard.
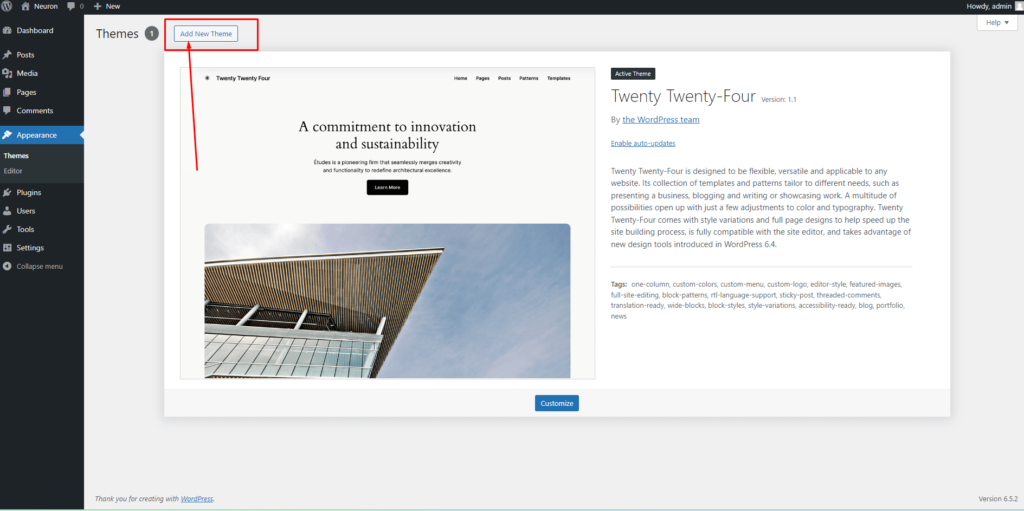
- Step 2 – Navigate to Appearance ► Themes.
- Step 3 – Click Add New button on top of the page.,
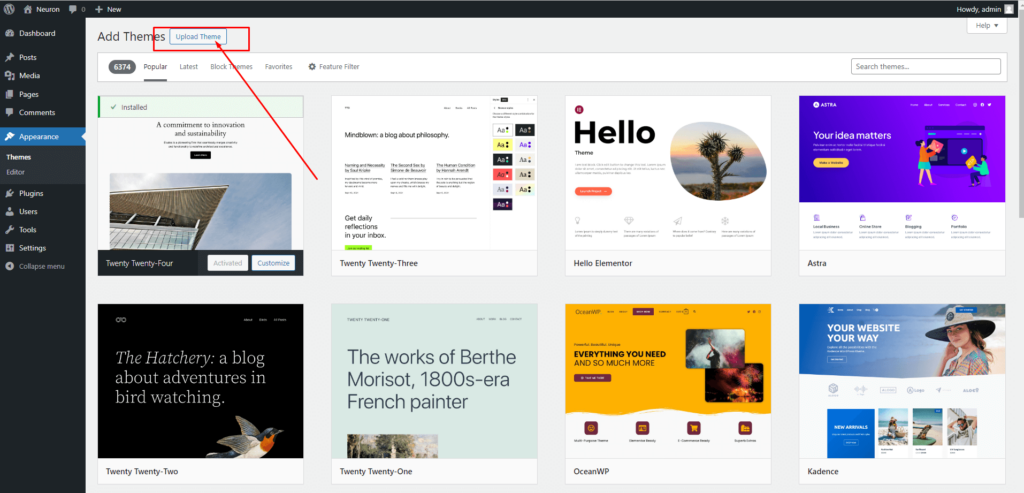
Step 4 – Then click Upload Theme
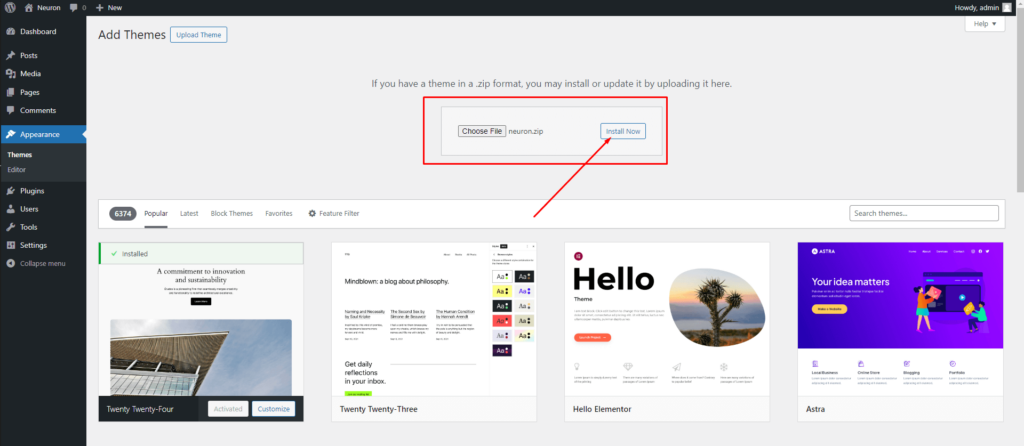
Step 5 – Next, Browse to the zip file and click Install now for the theme to be uploaded and installed.
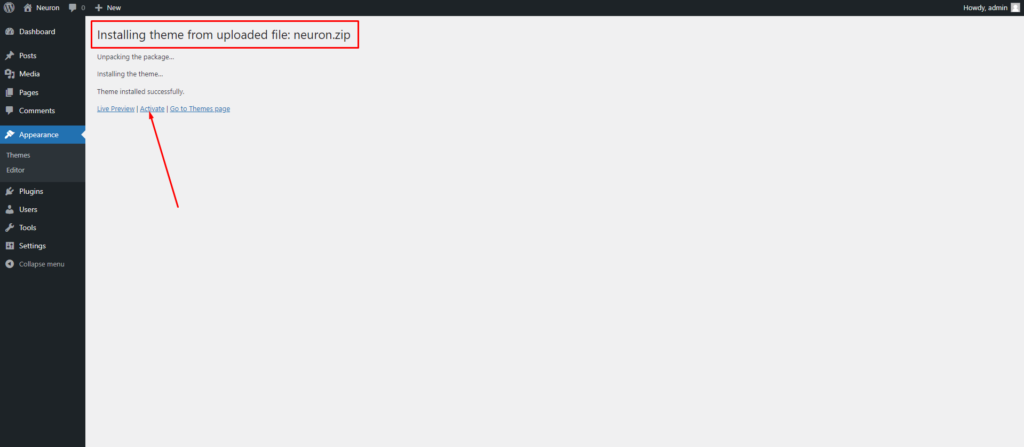
Step 6 – After done installing, click Activate the theme
4. 2. Theme Installation via FTP:
Using an FTP software like File Zilla or CuteFTP to upload the theme files to your WordPress site.
The first, extract the theme file “neuron.zip“, you will have a folder “neuron” include all theme files and folders (css, images, fonts…).
Please, follow the steps below to install the theme via FTP:
- Step 1 – Log into your hosting space (server) via FTP client.
- Step 2 – In extracted archive folder, find neuron.
- Step 3 – Upload the neuron folder to your server in path ROOT/wp-content/themes/.
- Step 4 – The uploaded path should be like this: ROOT/wp-content/themes/neuron/.
- Step 5 – Login to your WordPress Dasrdoard and go to Appearance ► Themes and activate the neuron theme.
If you have any further questions don’t hesitate to get in touch with our Support team.
Thanks for choose our Neuron WordPress Theme.