Installation
Thank you for choosing our theme installation process. It is designed to be the fastest and simplest way to set up your theme. Each section is organized independently, allowing you to configure them separately with ease. Get started now!
- Log into your WordPress back-end
- Navigate to Appearance Themes
- Click Install Add New
- Click Upload Theme
- Now you just need to find the “nexus.zip” in the Upload folder and hit Install now.
- After Installed then click Active Now
If you are experiencing any issues during the installation I would recommend to check out this Screencast by Envato
Theme Installation From FTP
The second installation method for this theme is via FTP upload. You may use either installation method—simply choose the one you prefer.
- Login to your FTP account and navigate to your WordPress Installation directory
- Navigate to the folder /wp-content/themes
- Upload the “Nexus” folder (not the .zip-file). This is the folder located inside the “Upload” folder in the zip-file you’ve downloaded from Themeforest.
- Now log into your WordPress backend
- Navigate to Appearance Themes
- Find the Theme and click Activate
Plugin Installation
So at this stage you have probably noticed a warning, asking you to install recommended plugins. This is needed to get required red sign plugins Contact Form 7, Elementor, Event Tickets, Jthemes Add-ons, One Click Demo Import, OptionTree, TSE Event Schedule Manager and The Events Calendar. . Installing that is very simple, you just need to click Begin installing plugins and you will be redirected to the plugin installation page where you can install Plugins.

The Events Calendar
The main required plugin for the theme to function correctly and to match up with other plugins and settings
Demo Installation
One Click Demo
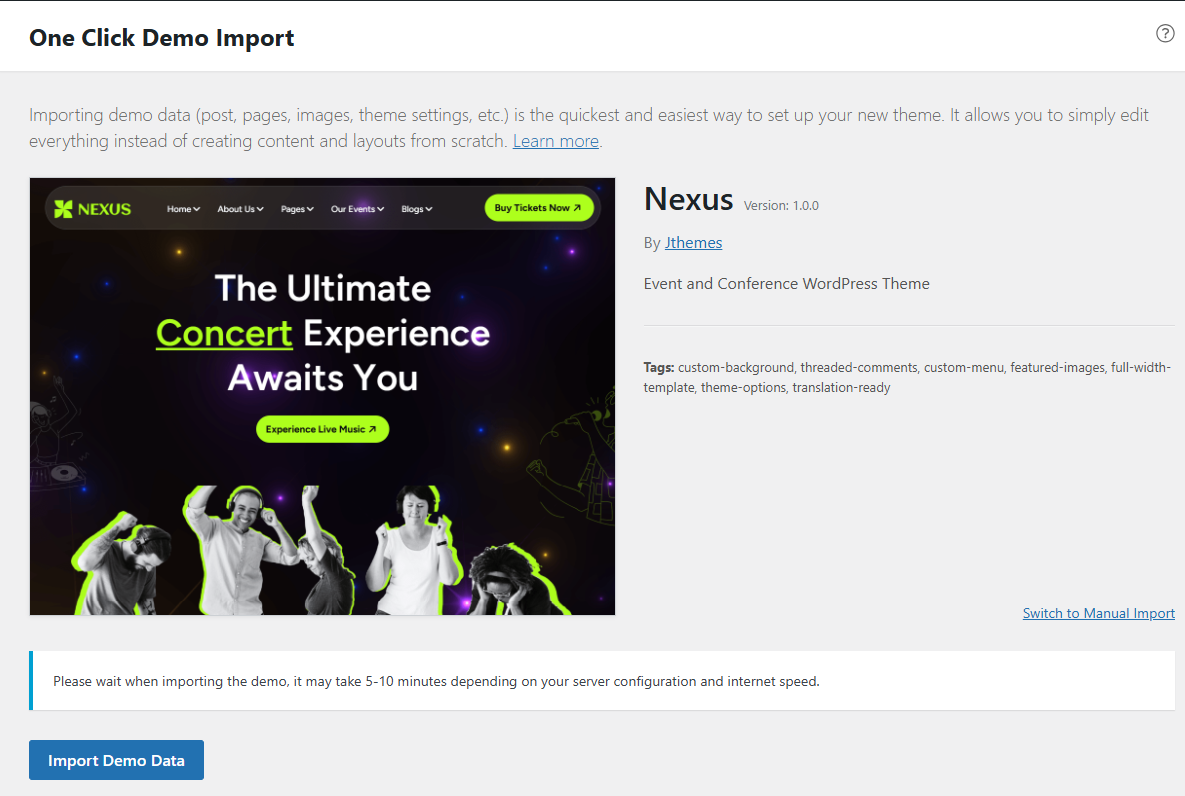
Click on Import Demo Data under the Appearance menu. Then, hover over the demo image and click on Import Demo to begin the installation. Please wait for 1–2 minutes.
If the success notification does not appear after 2 minutes, click the Install button again. This issue may occur due to low server resources or limited response time.
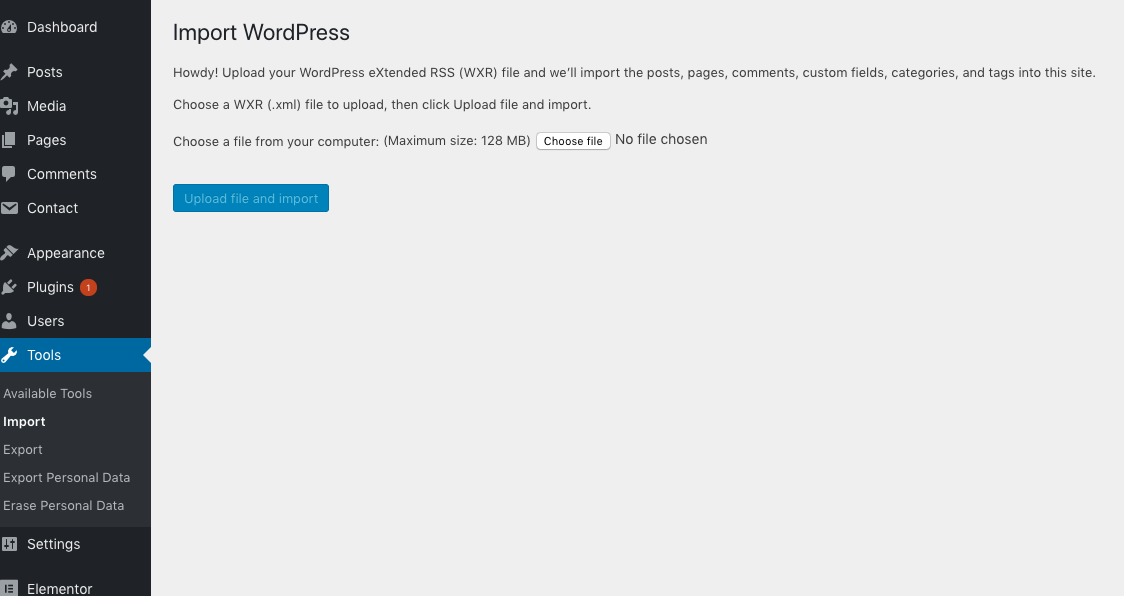
Manual
Go Tools Import WordPress Install It and Run Importer Choose sample data (please check theme package folder that you download from themeforest)
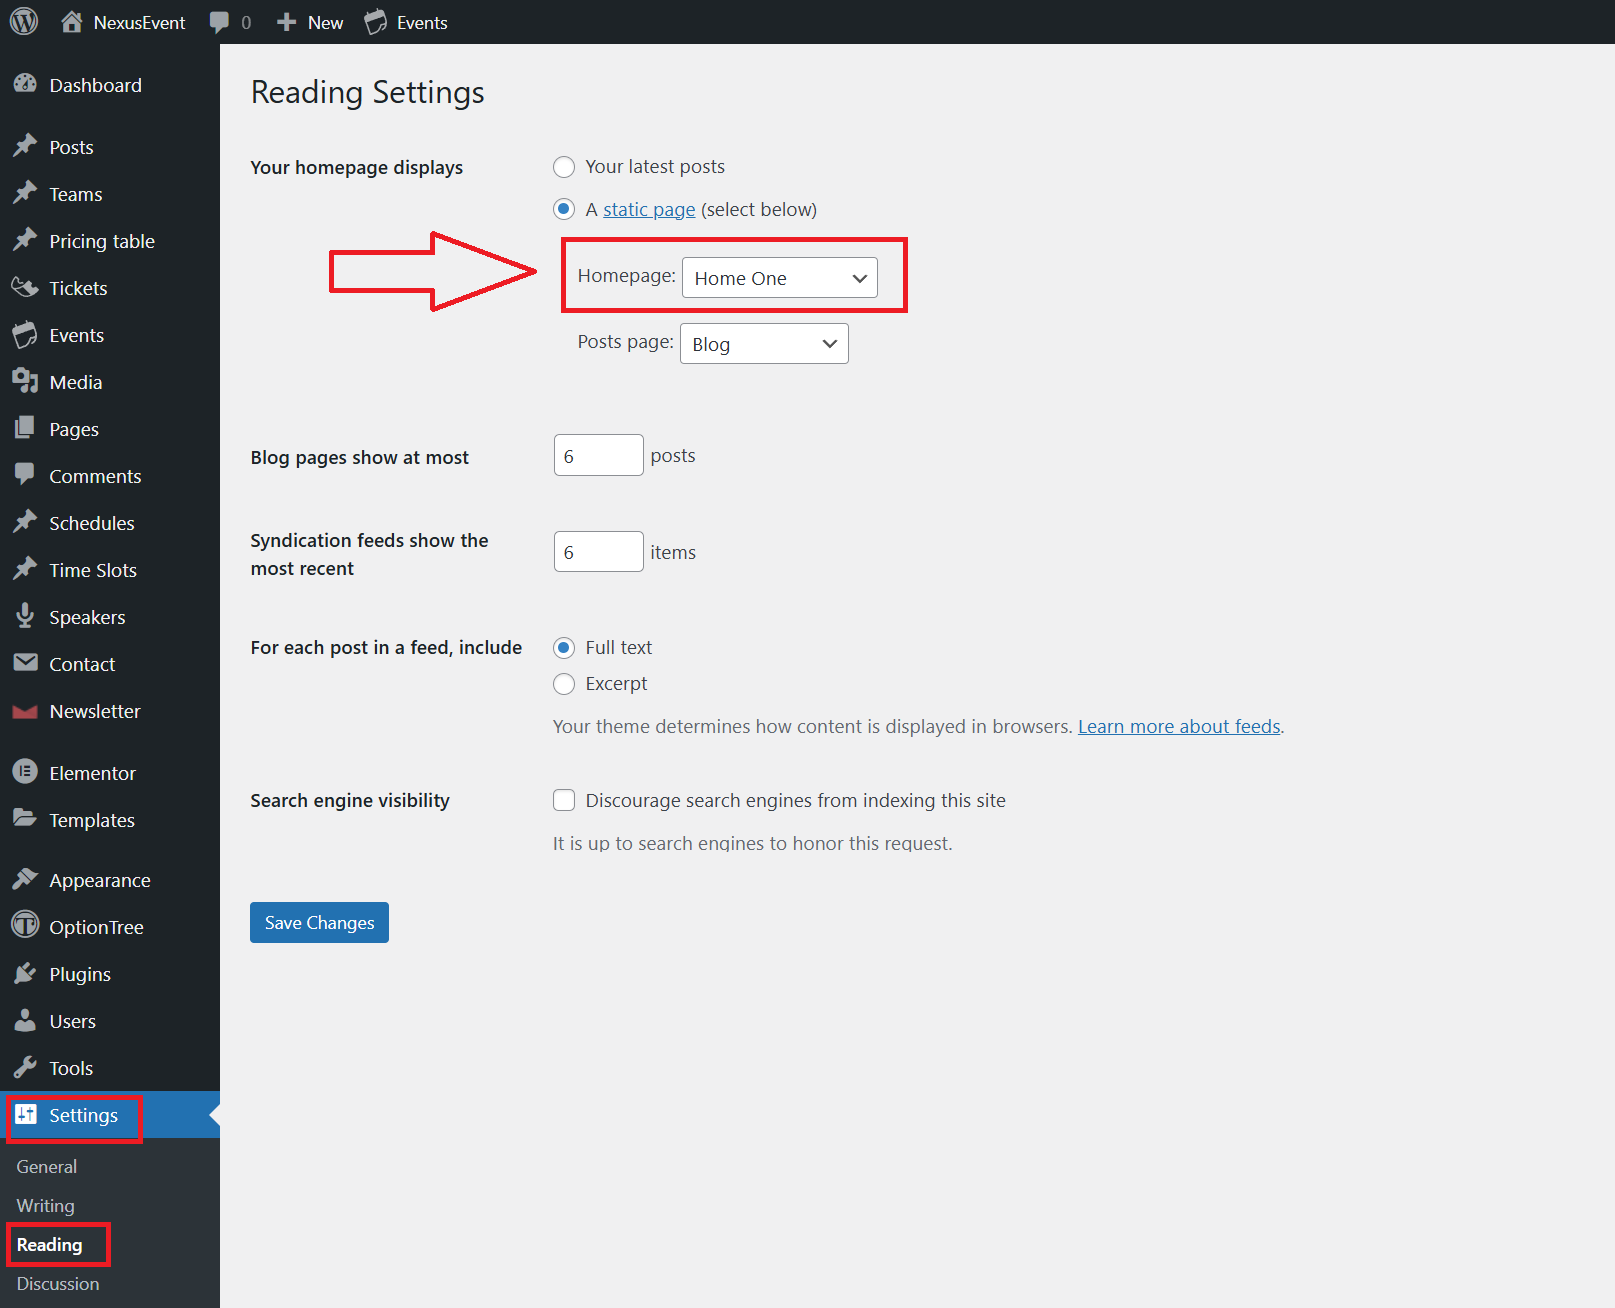
Change Homepage Option
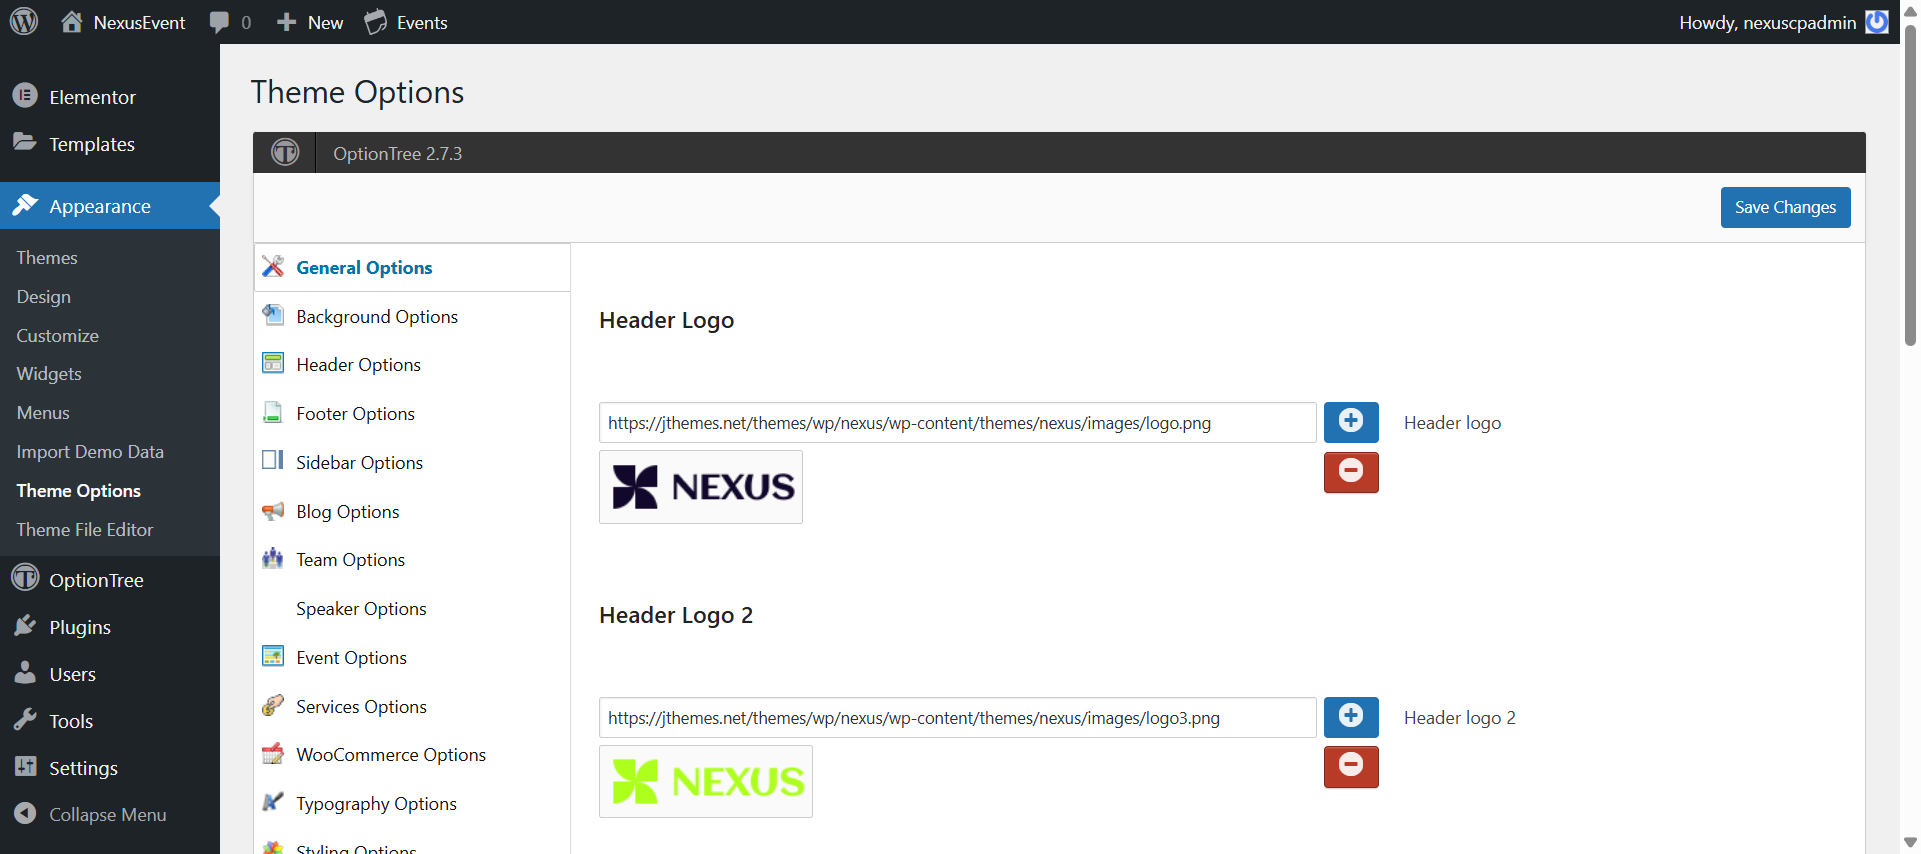
Theme Option
Theme Color
Go to >> Appearance >> Theme Options >> Styling Options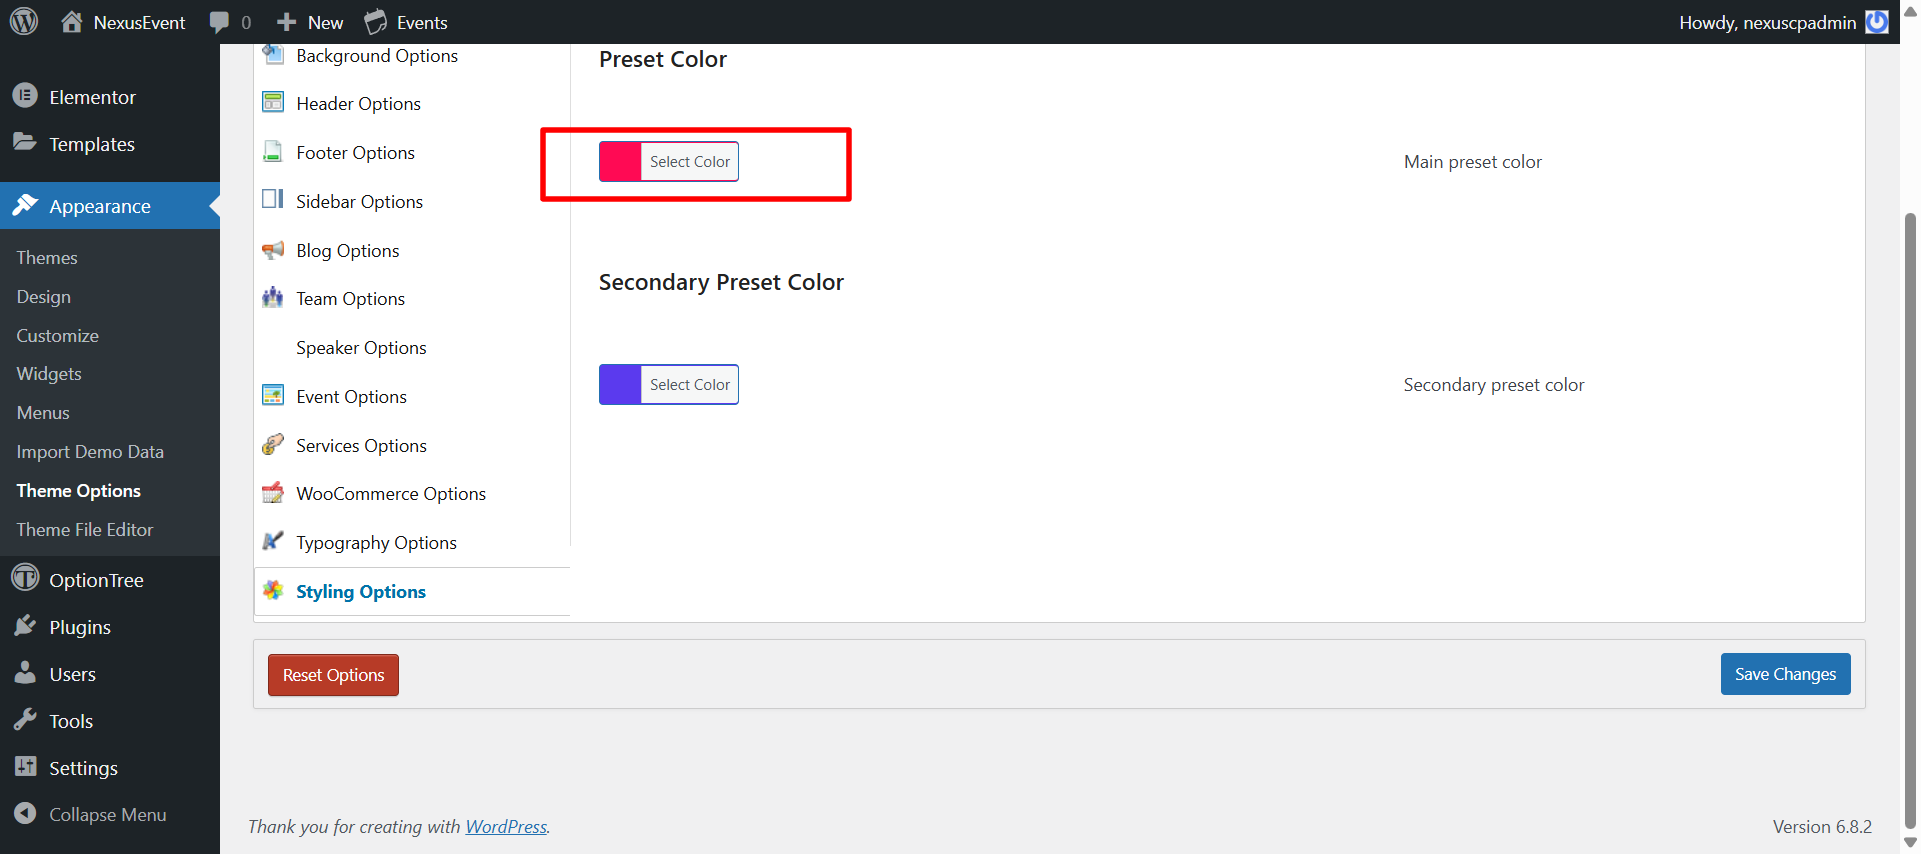
Header Style for Full Website
To set a global header style, go to:
Appearance >> Theme Options >> Header Options
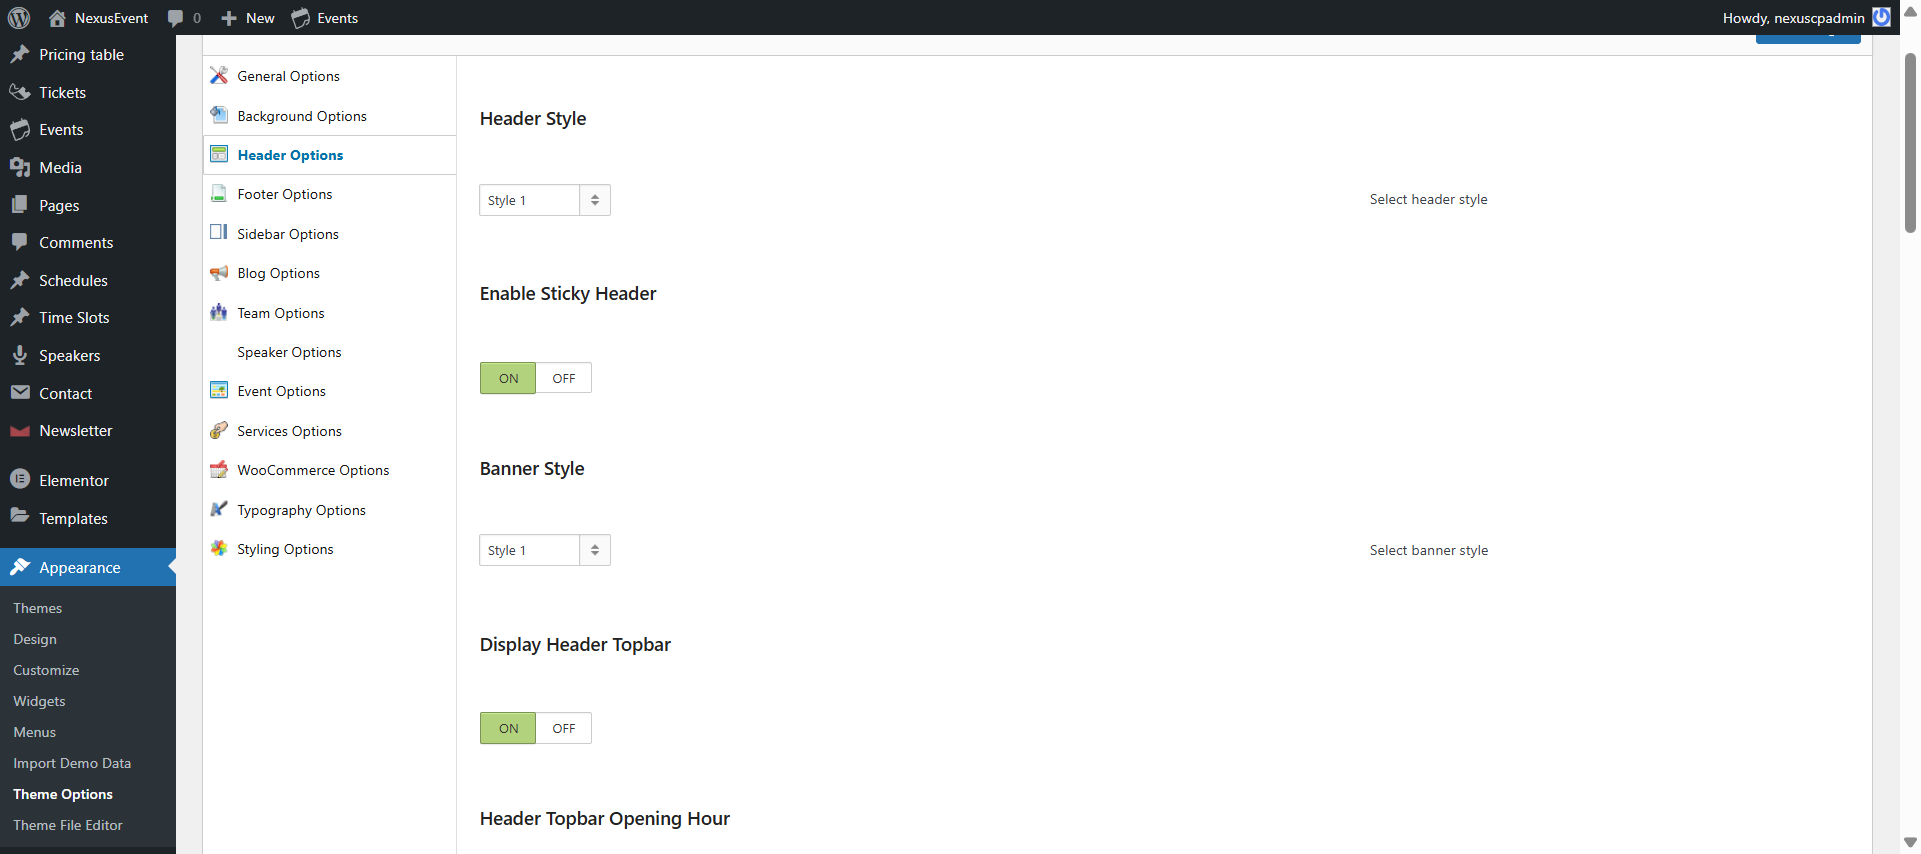
Change Header Style for a Single Page
Go to Pages >> Click on Edit
- Header Settings
- Overwrite Header Style
- Click "On" to enable header customization for the page
- Select your preferred style from the Header Style dropdown
Footer Style for Full Website
To set a global footer style, go to:
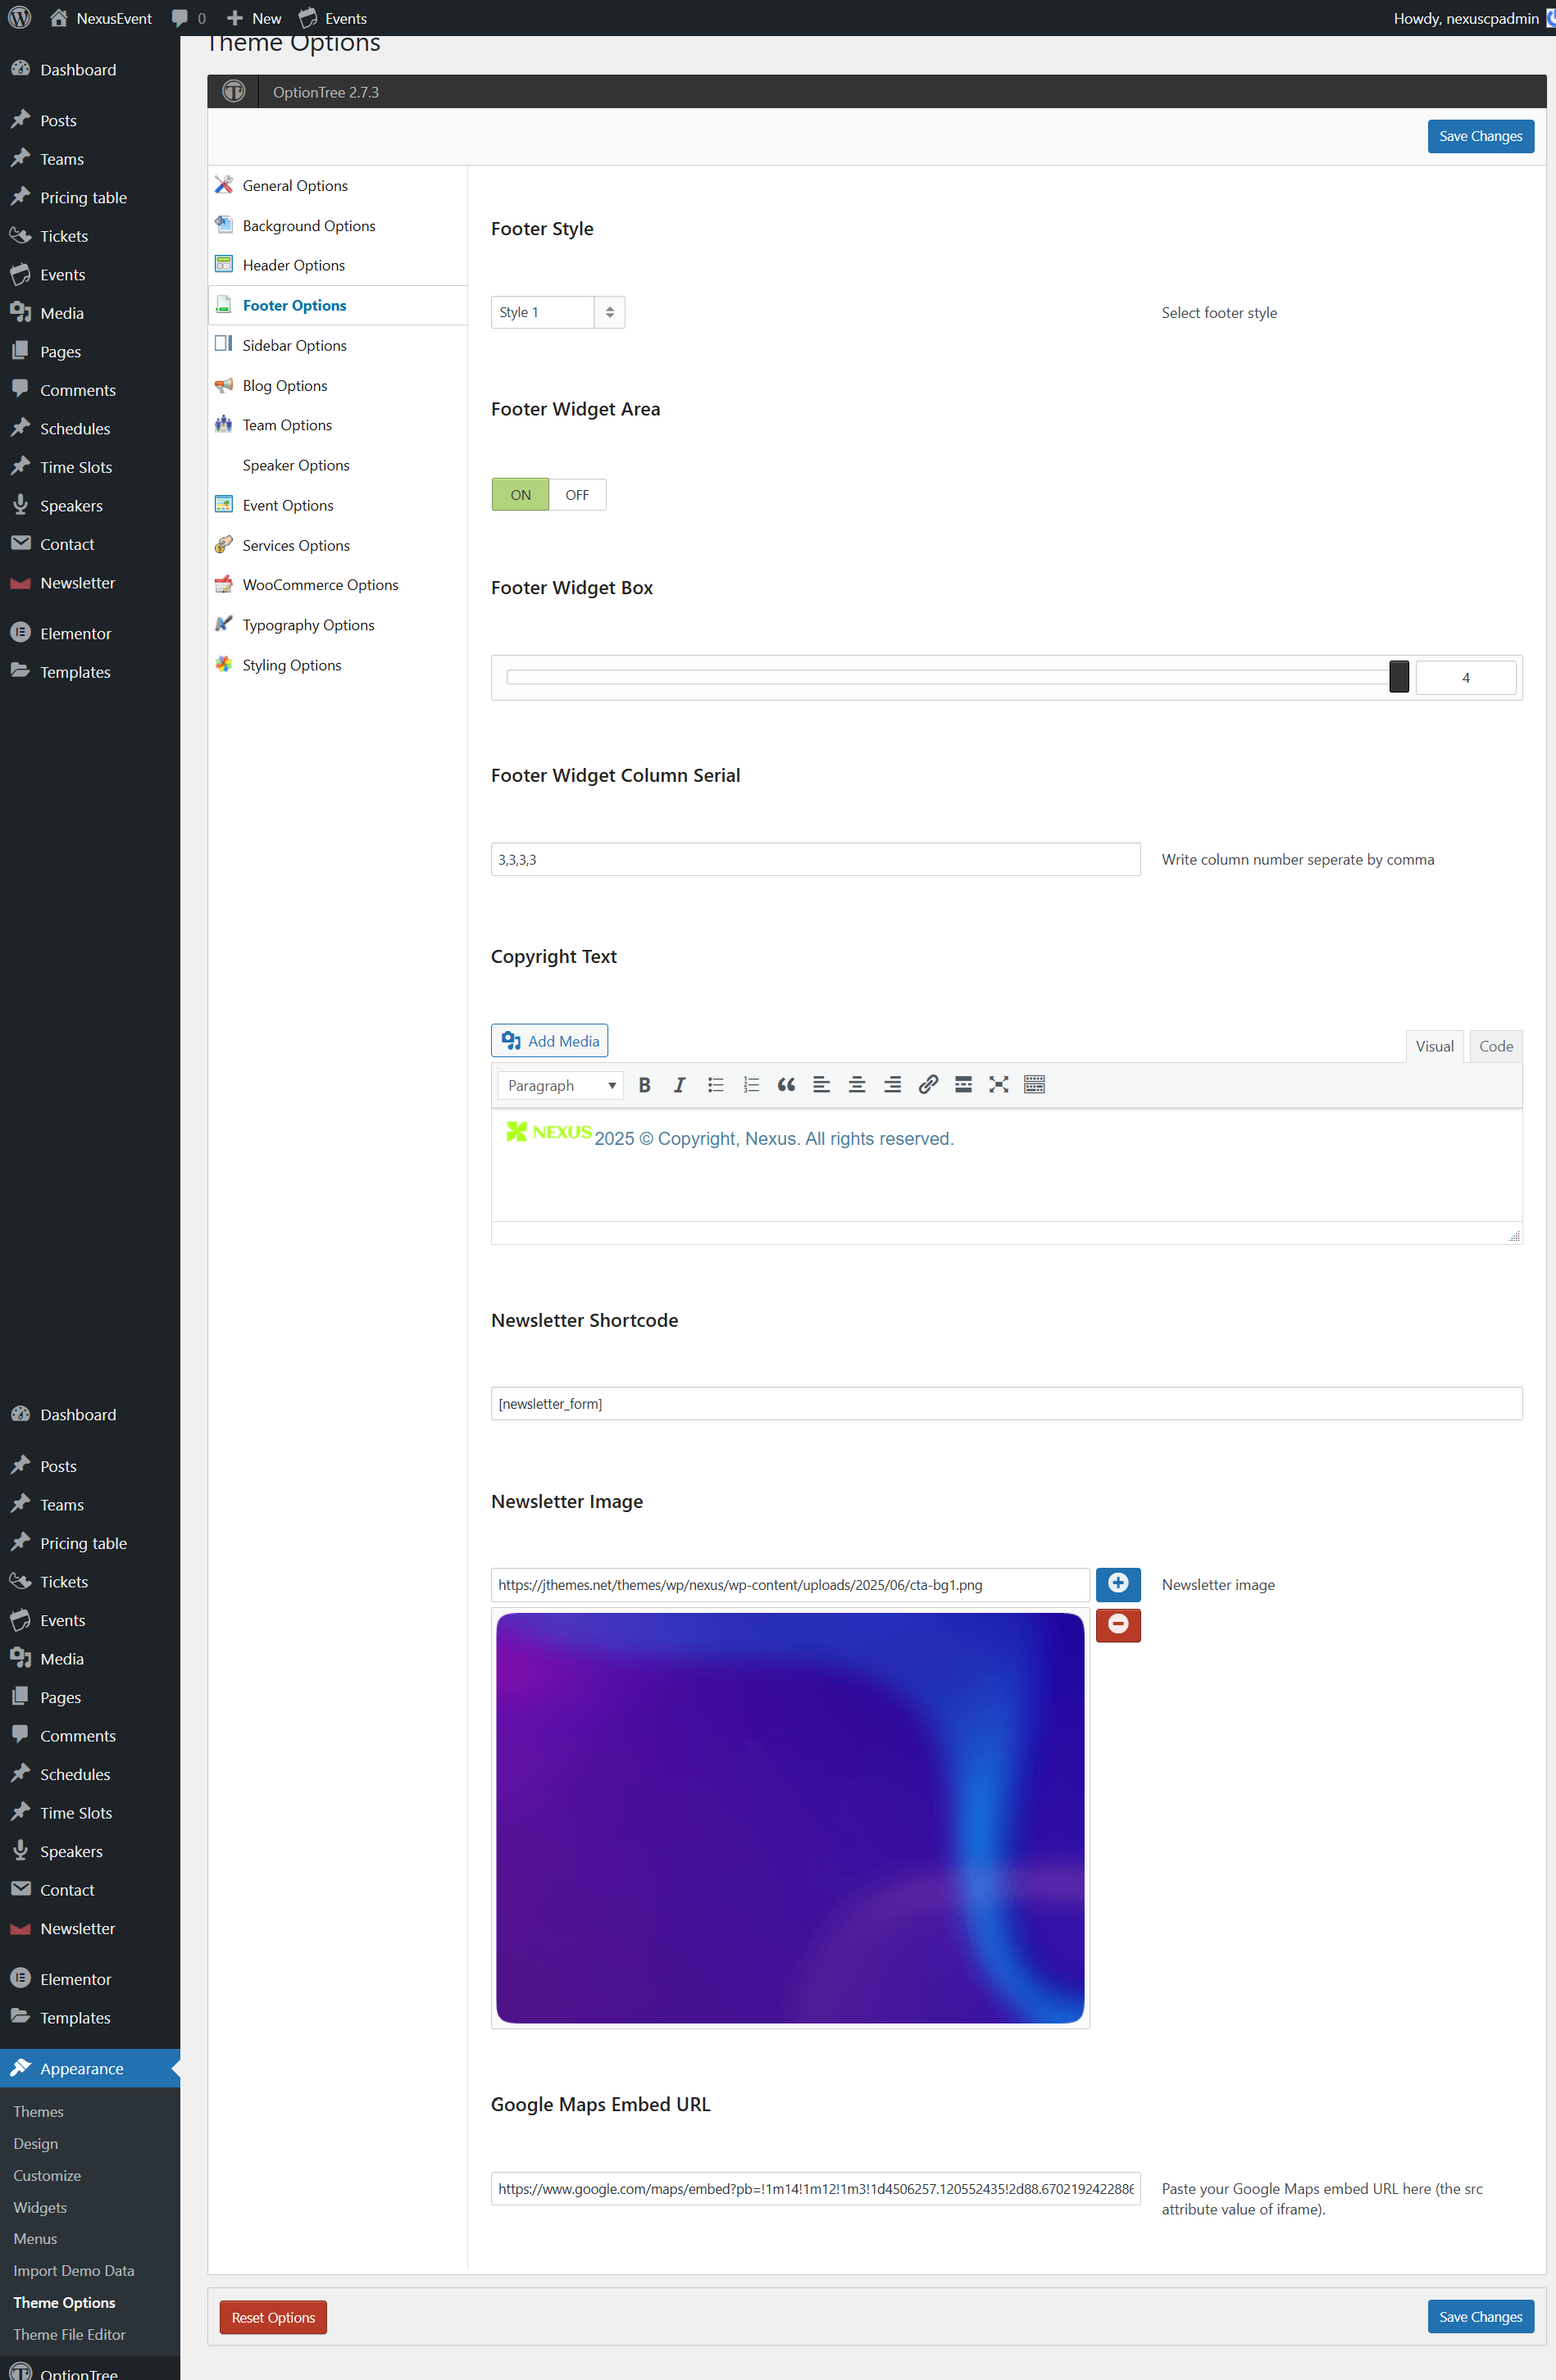
Appearance >> Theme Options >> Footer Options
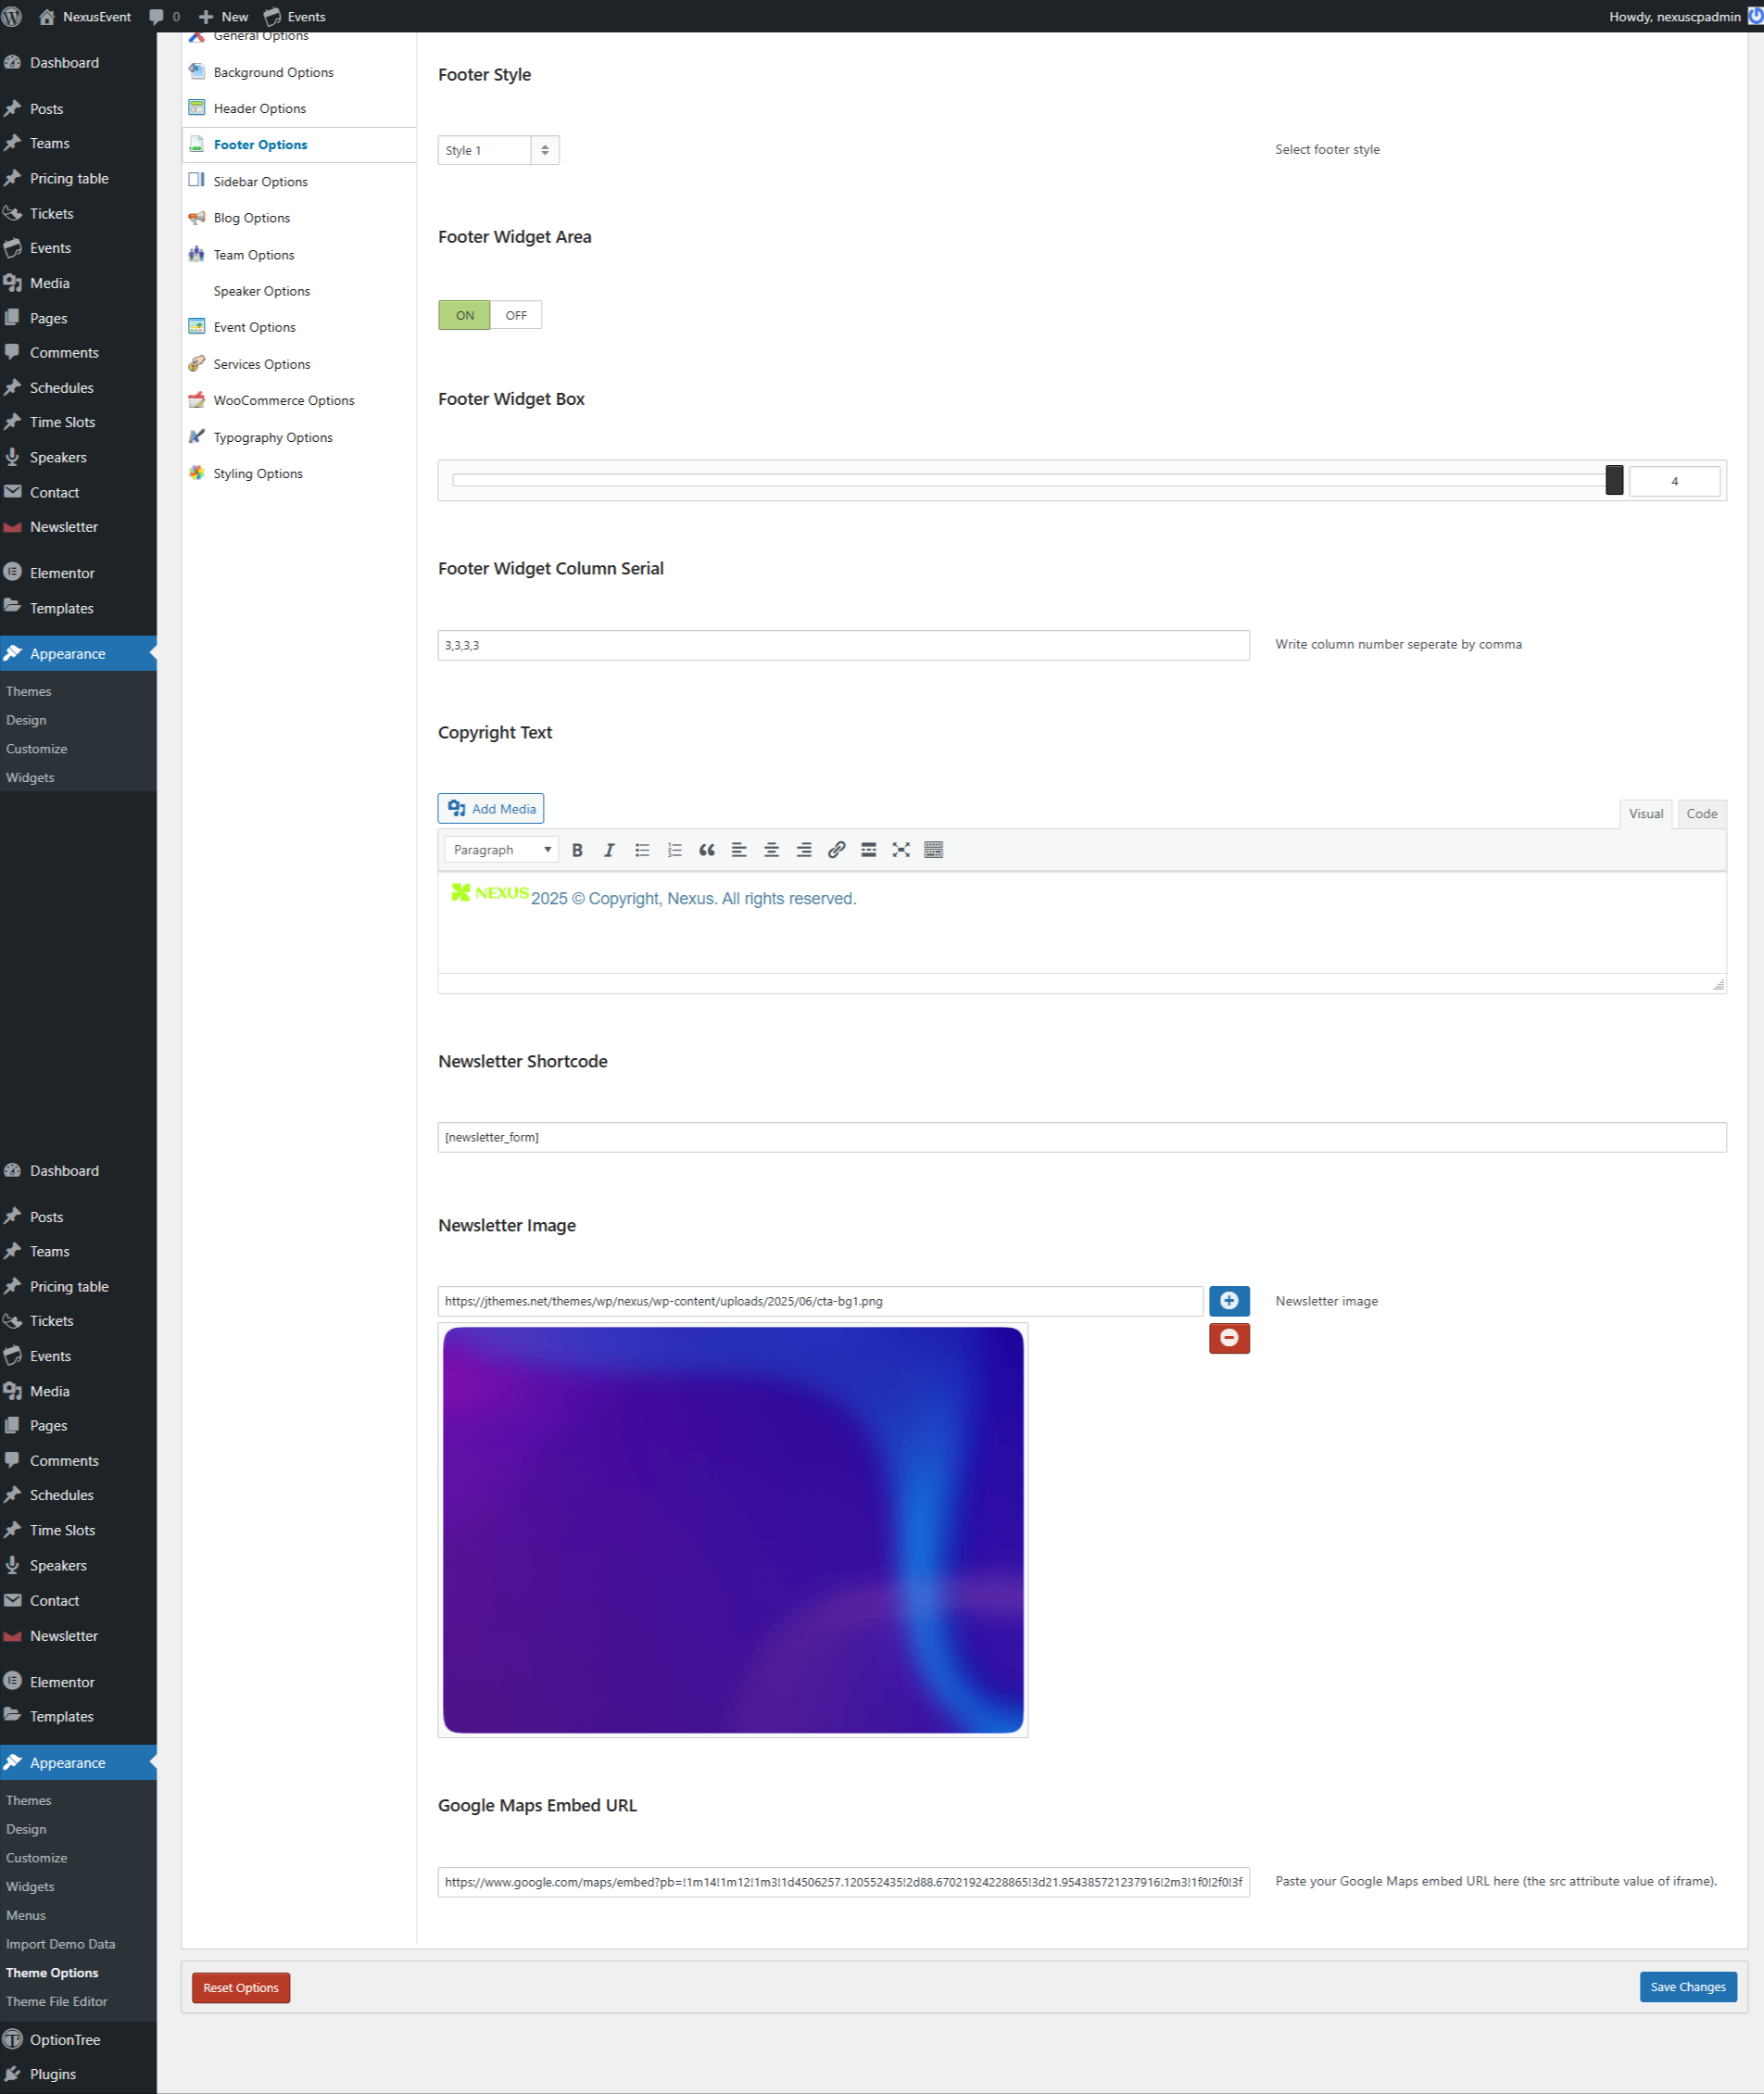
Change Footer Style for a Single Page
Go to Pages >> Click on Edit
- Footer Settings
- Overwrite Footer Style
- Click "On" to enable Footer customization for the page
- Select your preferred style from the Footer Style dropdown
Elementor Page Builder
Elementor is a visual page builder plugin for WordPress enabling the creation of web pages in a live, visual way. This step-by-step guide walks you through how to create a website using Elementor.
How to Use Elementor - Getting Started
If you are an Elementor newbie, this video will help you how to decorate section content in your page.
More Details
Home Page Setup
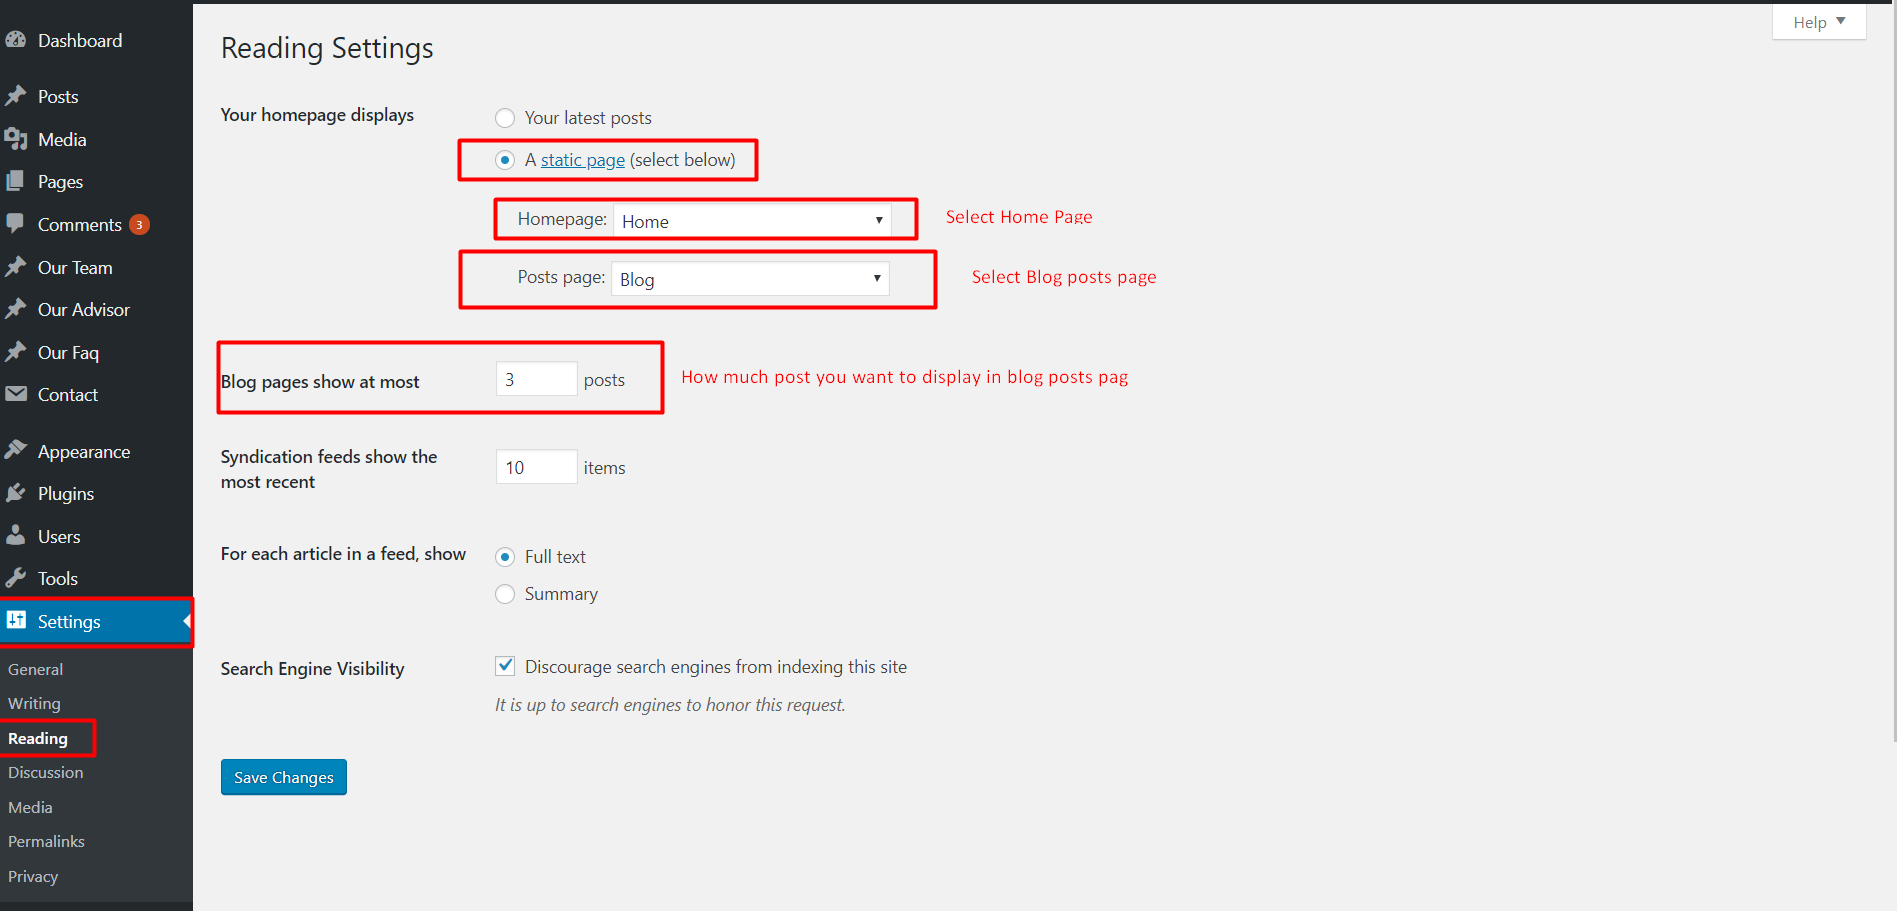
After installation and activating Nexus, you need to perform the following tasks to enable landing page.
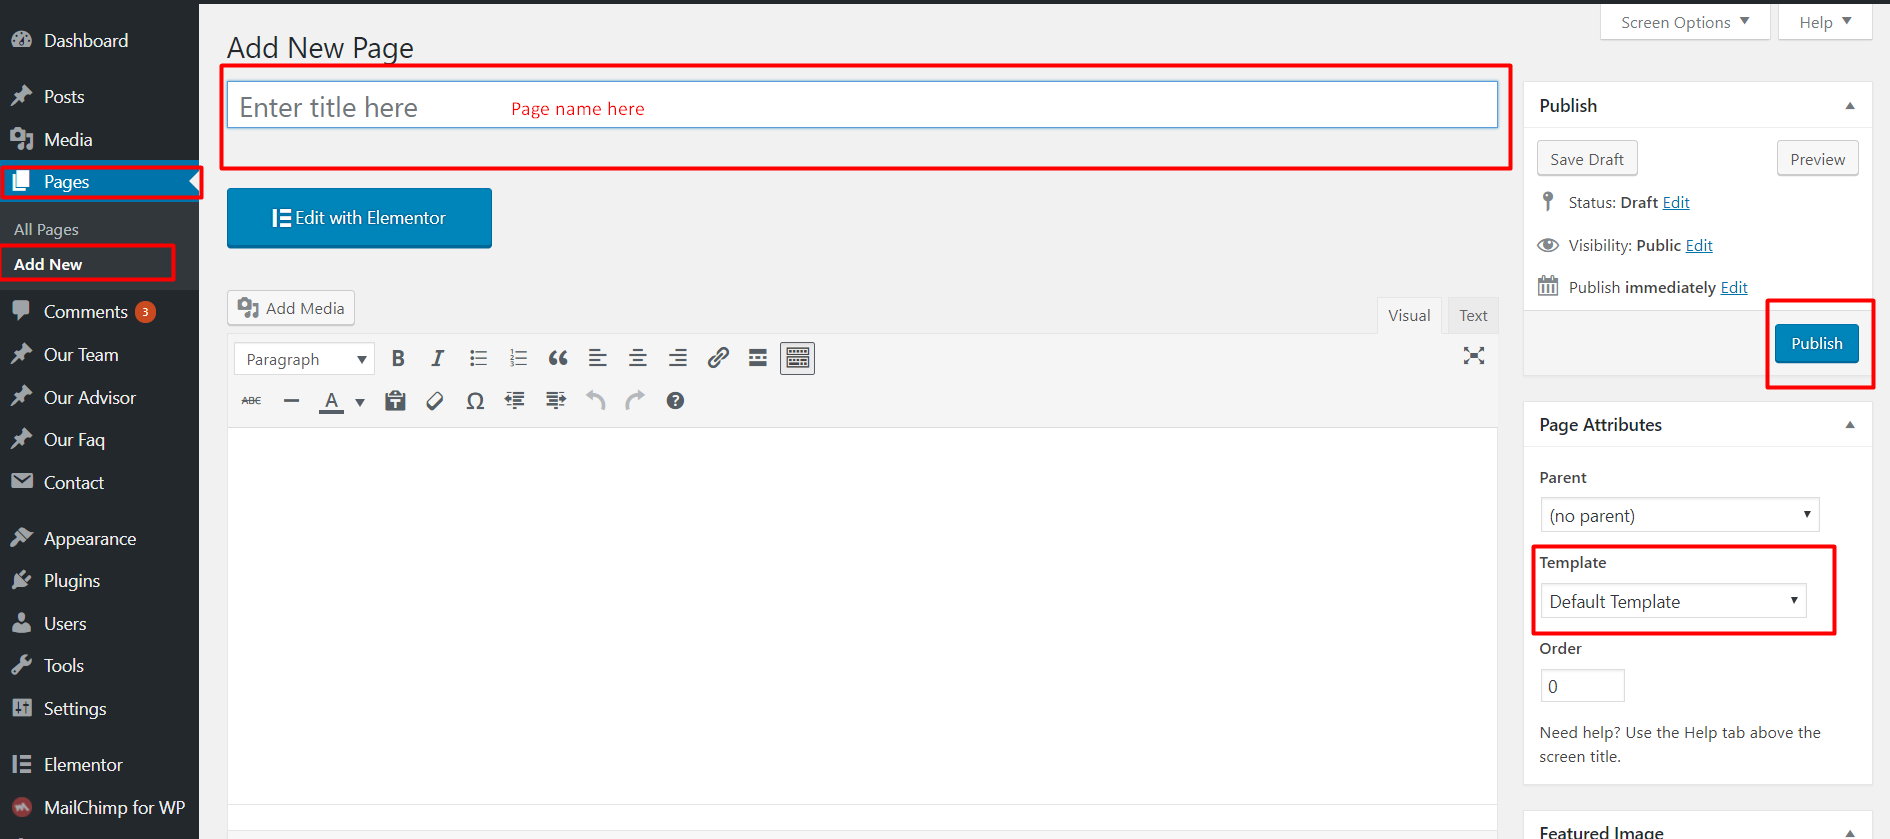
Create new page (Pages Add New) with a title “Home Page or your wish name” and select the Homepage Template. Now save/publish it.
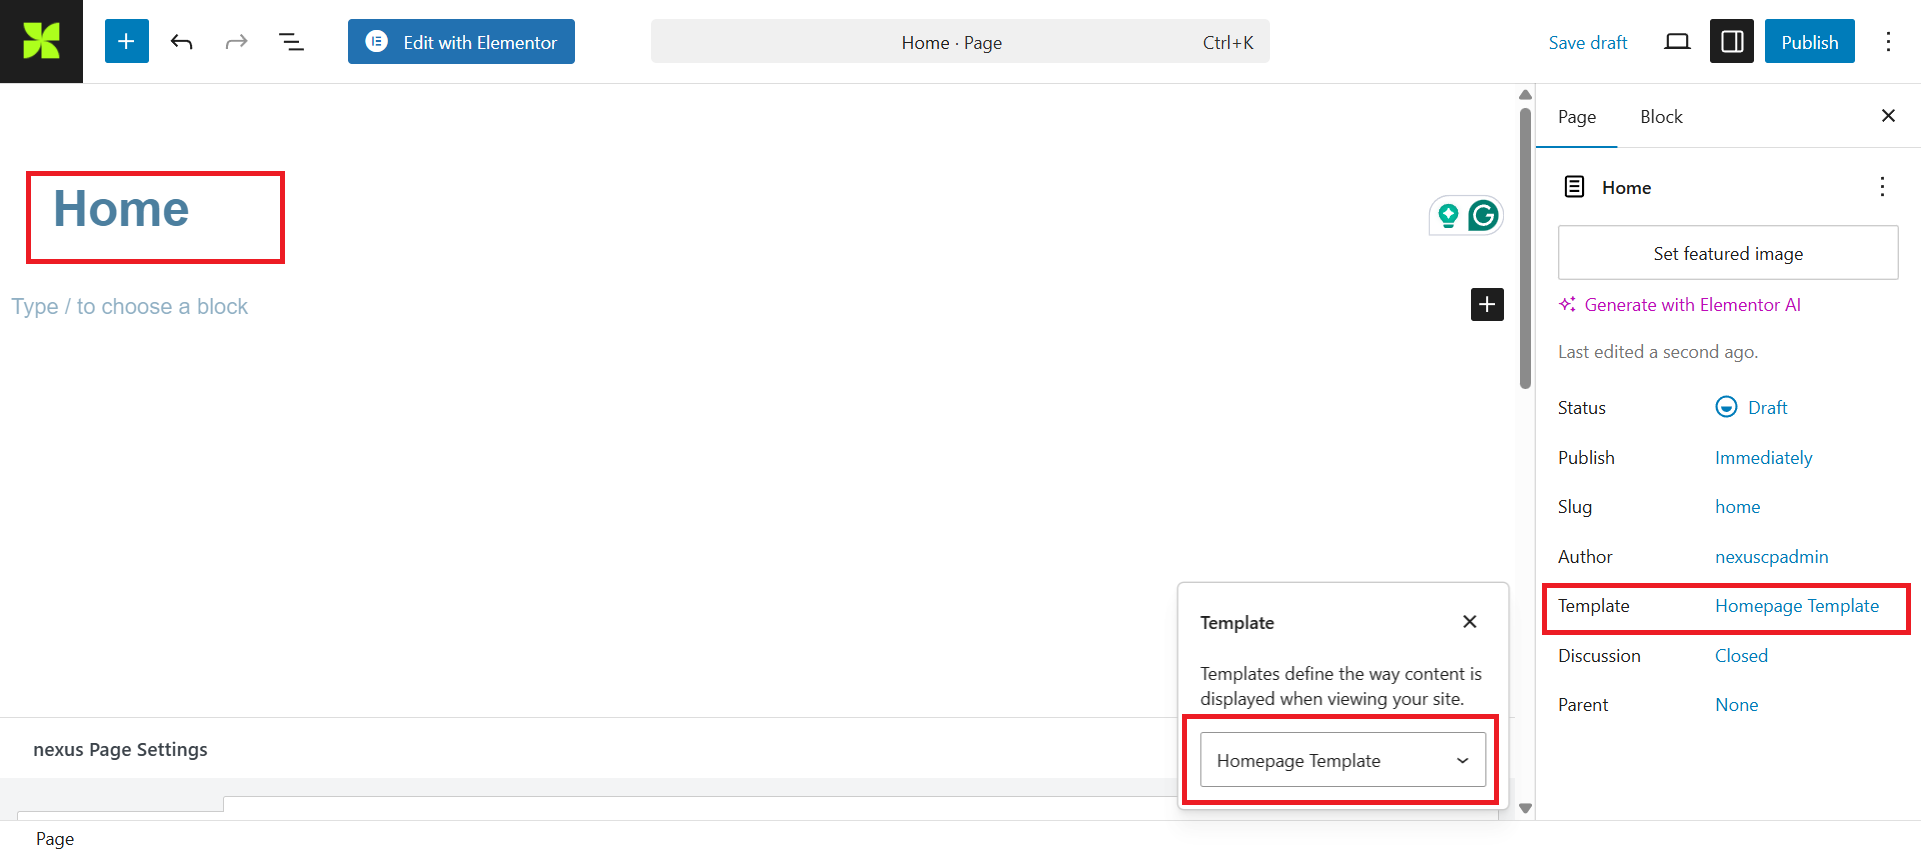
Our Inner or Different Page Templates
Like as home page you will select the page template from the right side page template drop down menu. If you want to default page, Please select Default Template.
Faq
Contact form 7
Contact Form 7 can manage multiple contact forms, plus you can customize the form and the mail contents flexibly with simple markup. The form supports Ajax-powered submitting, CAPTCHA, Akismet spam filtering and so on.
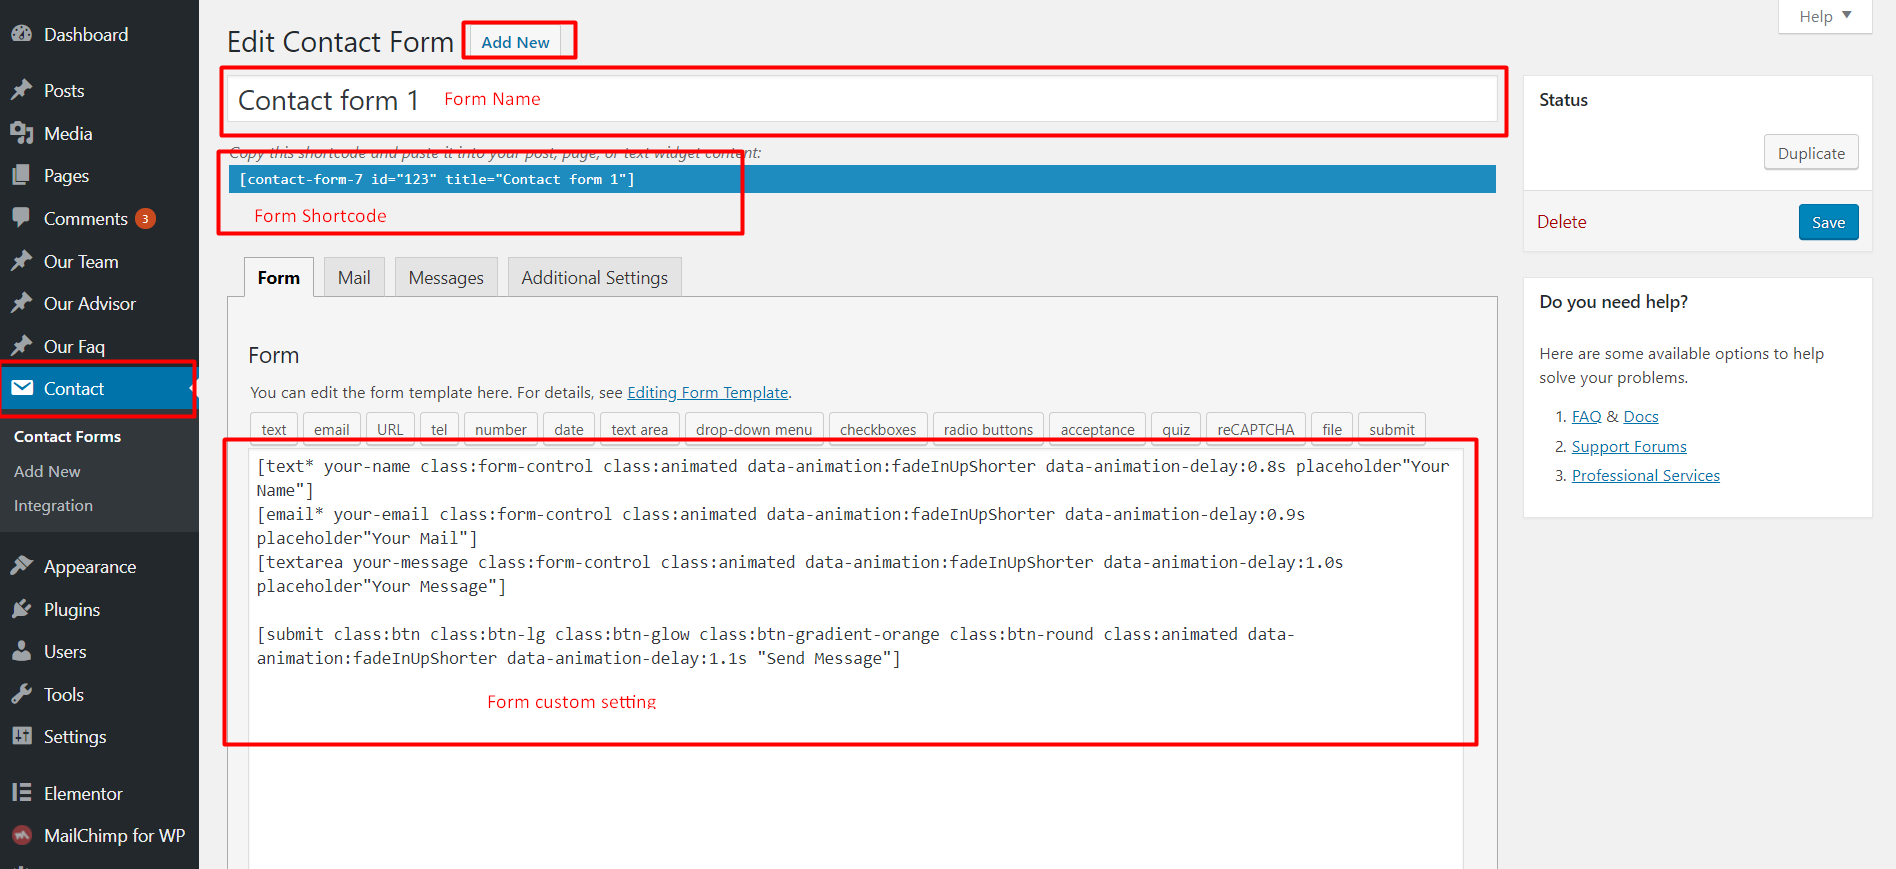
Contact form 1 raw code (Copy & Past it for your cf7 form build)
        <div class="row contact-form">
<div class="col-lg-6">
[text* your-name class:form-control placeholder "Your Name"]
</div>
<div class="col-lg-6">
[email* your-email class:form-control placeholder "Your Email"]
</div>
        <div class="col-lg-12">
[text your-subject class:form-control placeholder "Your Subject"]
</div>
        <div class="col-lg-12">
[textarea your-message class:form-control placeholder "Your Message"]
</div>
        <div class="col-lg-12 m-top-15 form-btn text-center">
[submit class:btn class:btn-lightblue class:submit "Send Your Message"]
</div>
</div>
See video about form setup
More Details
Newsletter Plugin Setup
Our theme supports the Newsletter plugin to help you build and manage your email subscriber list easily.
Go to Newsletter > Subscription > Forms to create or customize your forms.
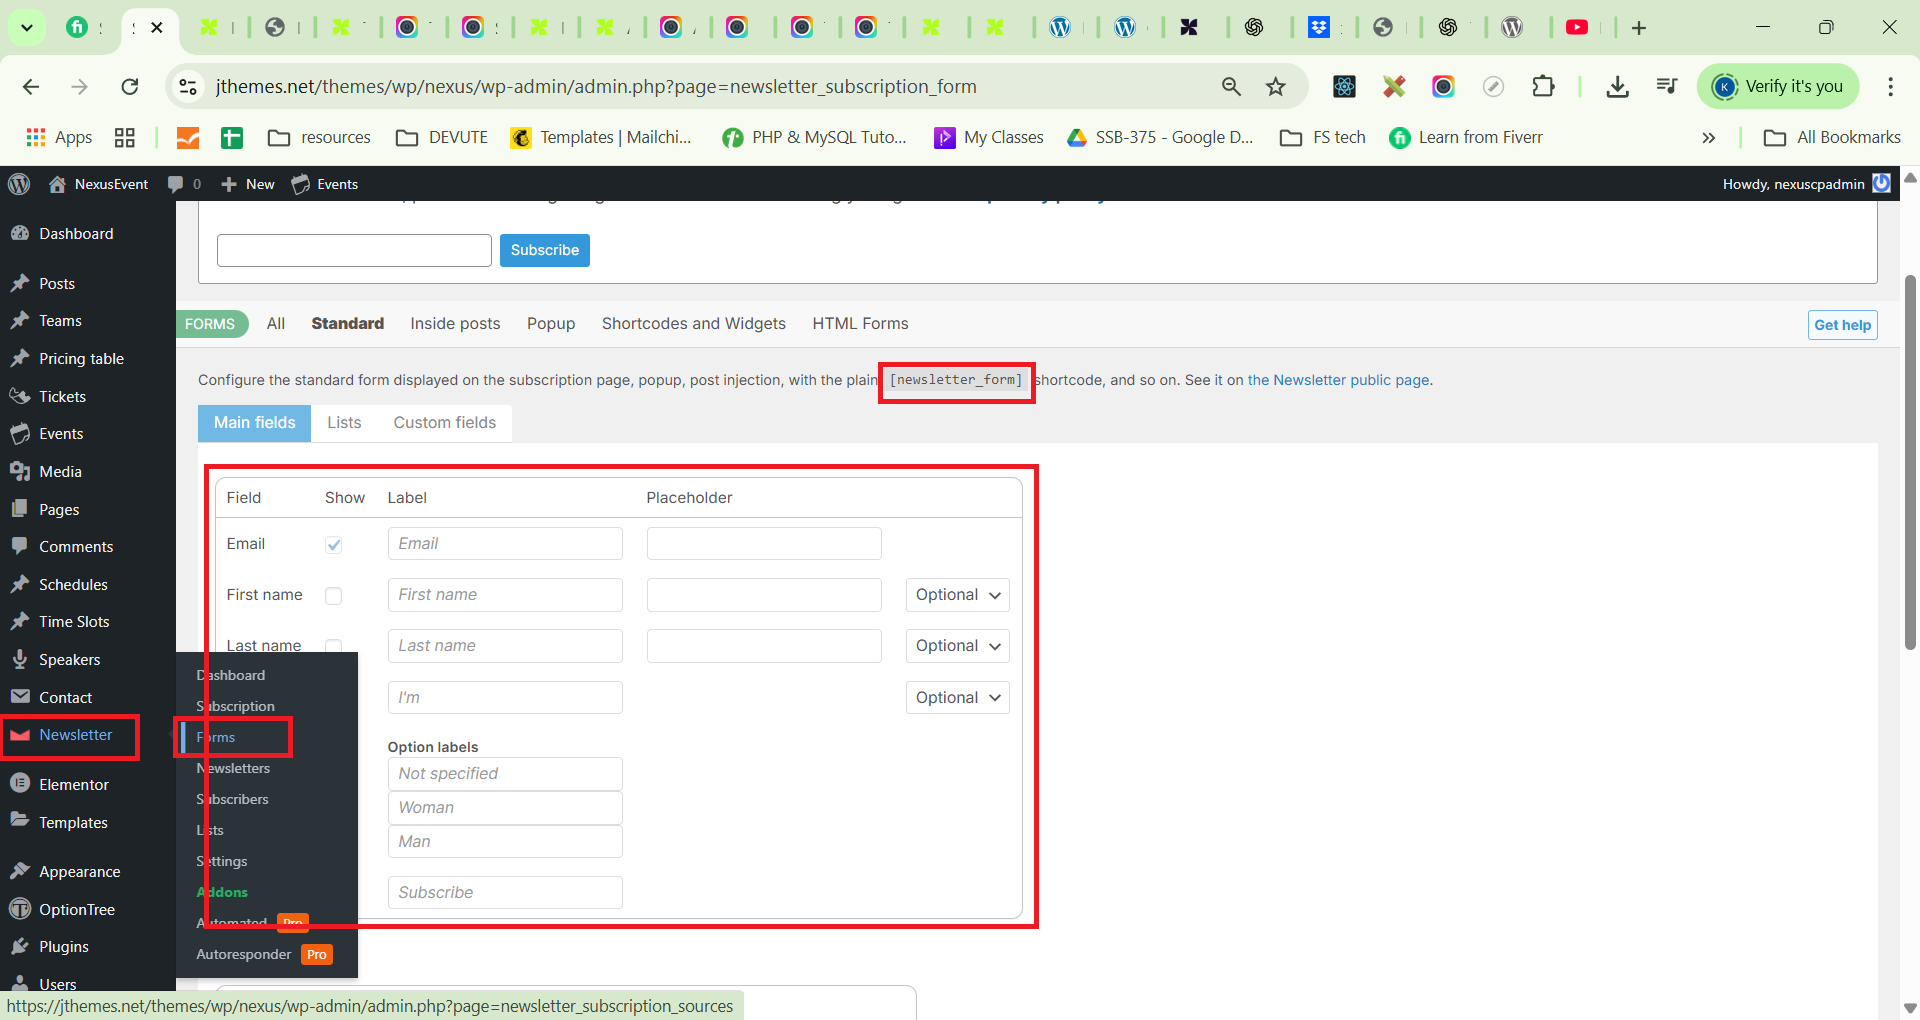
- Go to Appearance > Theme Options > Footer Options and search for "Newsletter Shortcode."
-
Use the provided shortcode (e.g.,
[newsletter_form]) to display the form in Top footer on your site, such as in a widget, page, or Elementor block.
Note: You can configure more options like email templates, automated emails, and subscriber management under the Newsletter menu.
See video about Newsletter setup
More Details
End Of Nexus Documentation
Please refer to the Nexus documentation before setting it up. If you need further clarification, feel free to reach out—we’re happy to assist.